
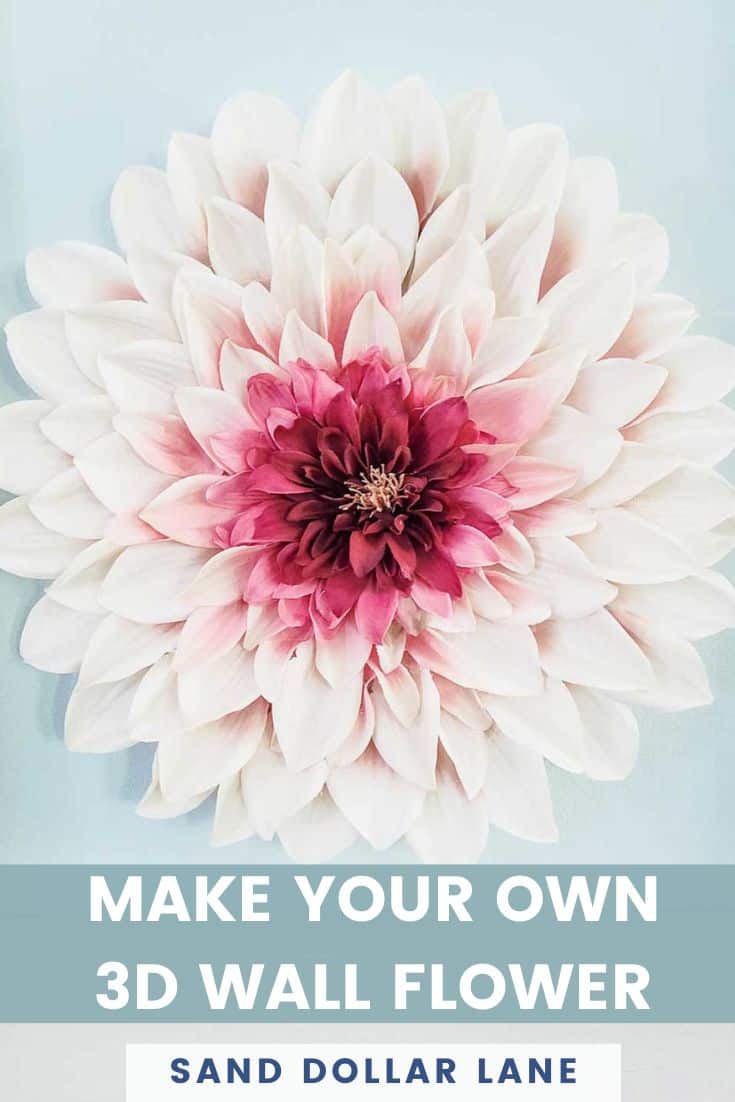
Flower Wall Hanging DIY Project
This flower wall hanging is such a fun and easy DIY project!
Learn how you can create this flower wall art in about 20 minutes!
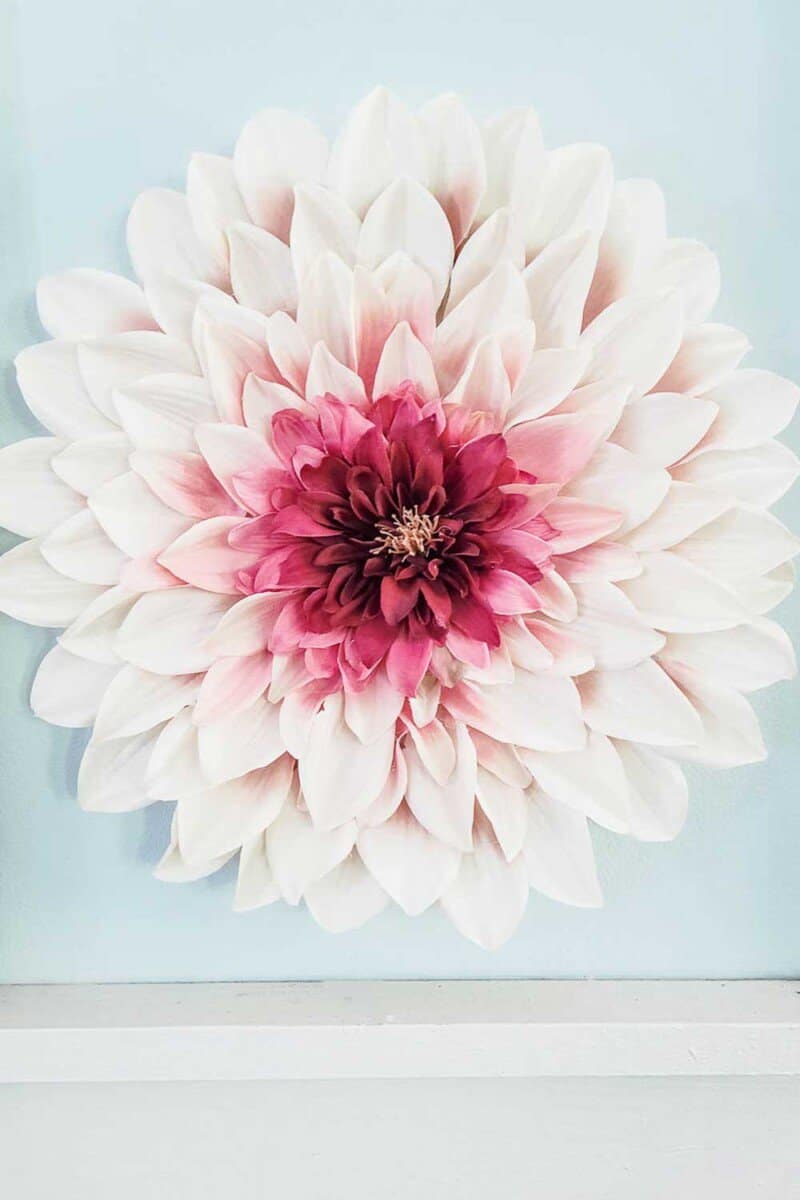
If you are looking for a craft project that will add a pop of color and dimension to your wall, this Flower Wall Hanging Tutorial is for you!
Read on to see how easy and versatile this fun project is.
Supplies for Flower Wall Hanging
You only need a few things for this project. Select any flowers you like in any colors.
Just be sure they have a lot of petals or your wall hanging will look a little sparse. Here’s what I used (or similar)-
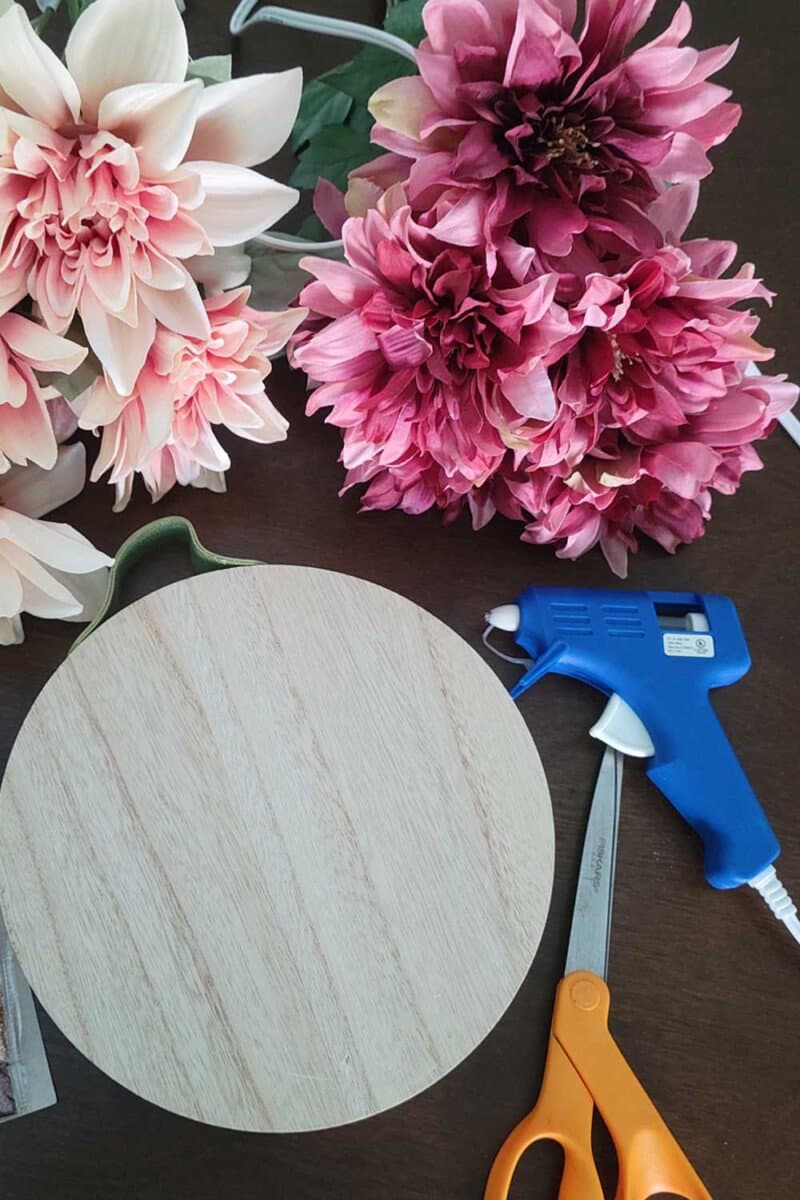
- Dahlia Flower Bouquet (cream/pink)
- Dahlia Flower Bouquet (dark pink)
- Hot Glue Gun
- Hot Glue Sticks
- Fabric Scissors
- Wooden Wall Hanger for Backing (similar, the one I used isn’t available any longer)
Since you are not using the stems, you can get flower heads instead. Here are a few that I think would make great flower wall art.
- These Dahlia Flower Heads come in several colors
- A Box of Mixed Flower Heads in Coordinating Colors (I am going to use this on my Spring flower hanging!)
- If you are looking for blue flowers, this combo is perfect

How to Make Flower Wall Art
Now that you have your supplies ready, it’s time to create your wall art.
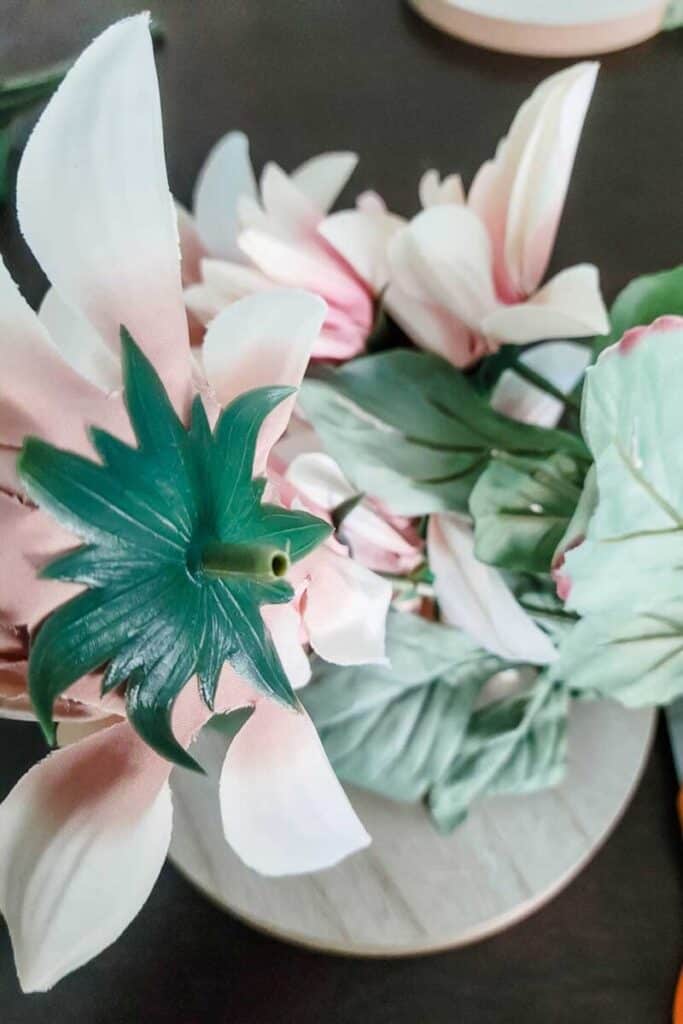
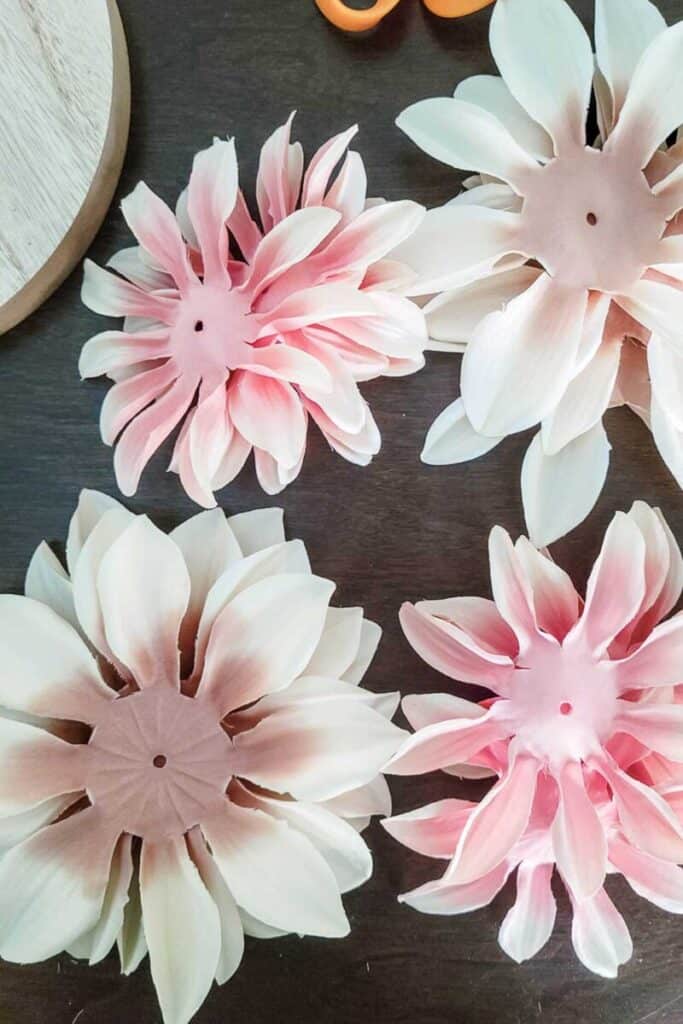
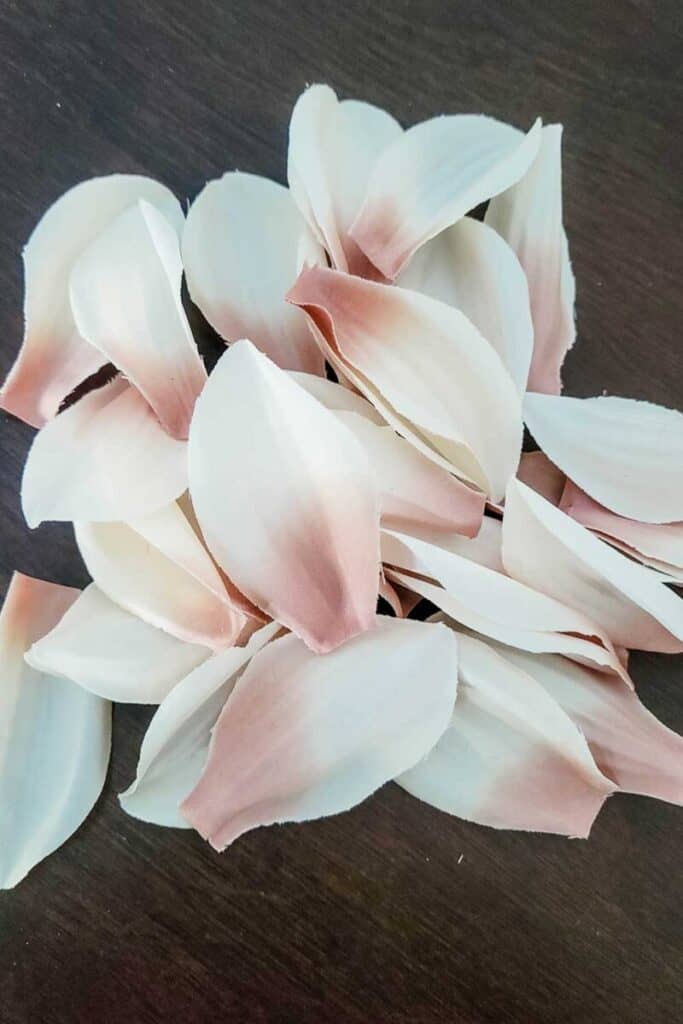
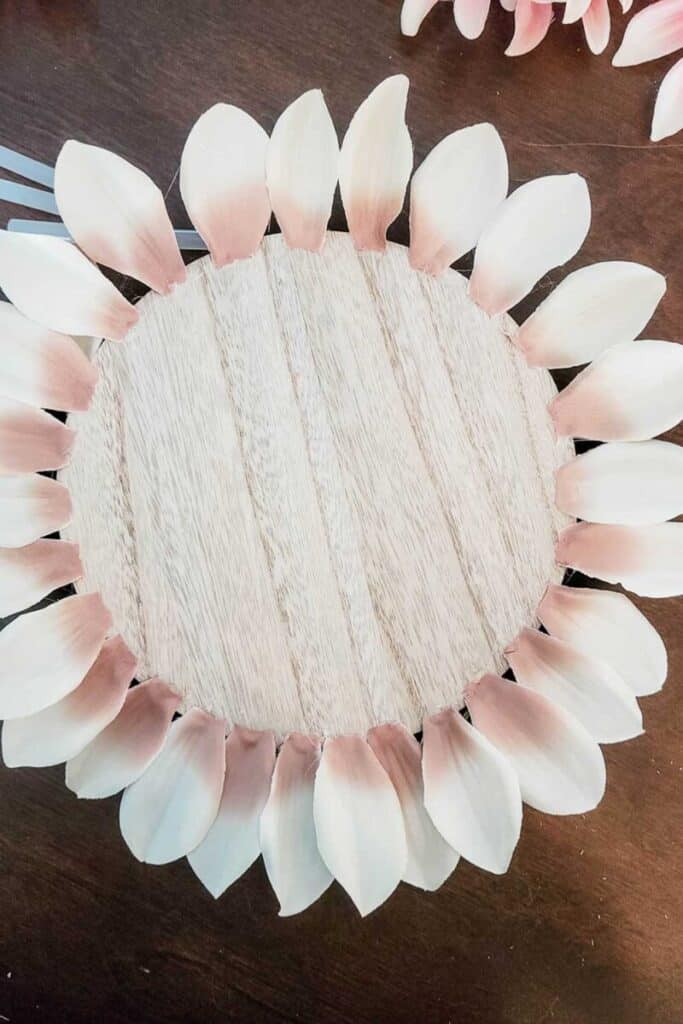
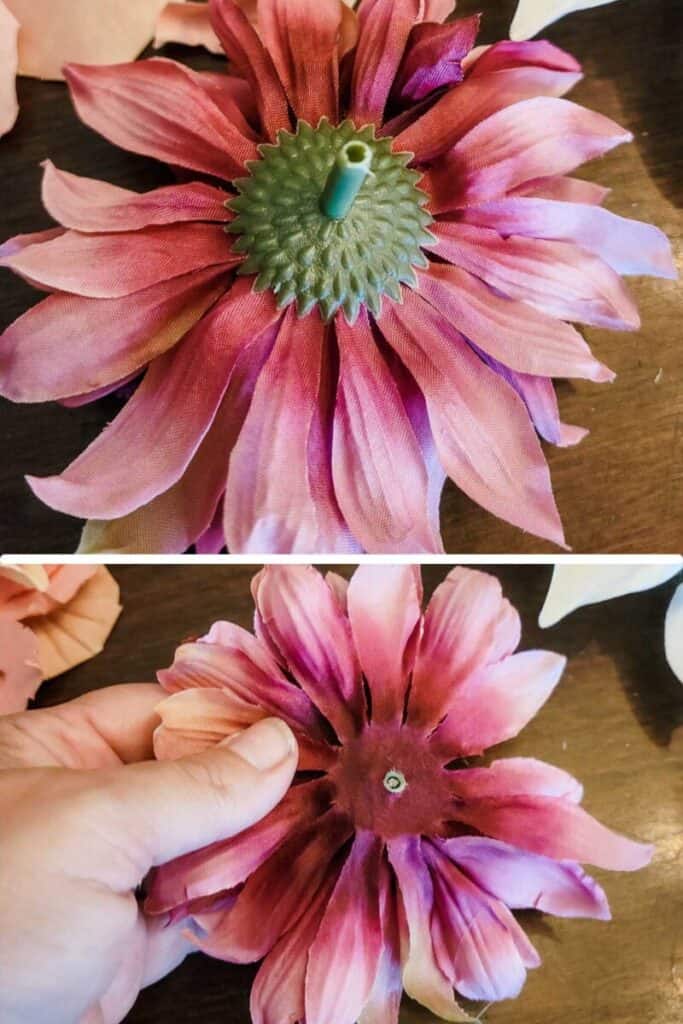
First, take apart the flowers that you will use for the outer petals.
Once you have the backings off the flowers, separate them into piles keeping similar sizes together.
For example, remove the outer larger petals from each flower and put them in pile together, then move on to the second layer of petals and so on.
Using your fabric scissors separate the individual petals and keep like sizes together.
Now it’s time to start gluing.

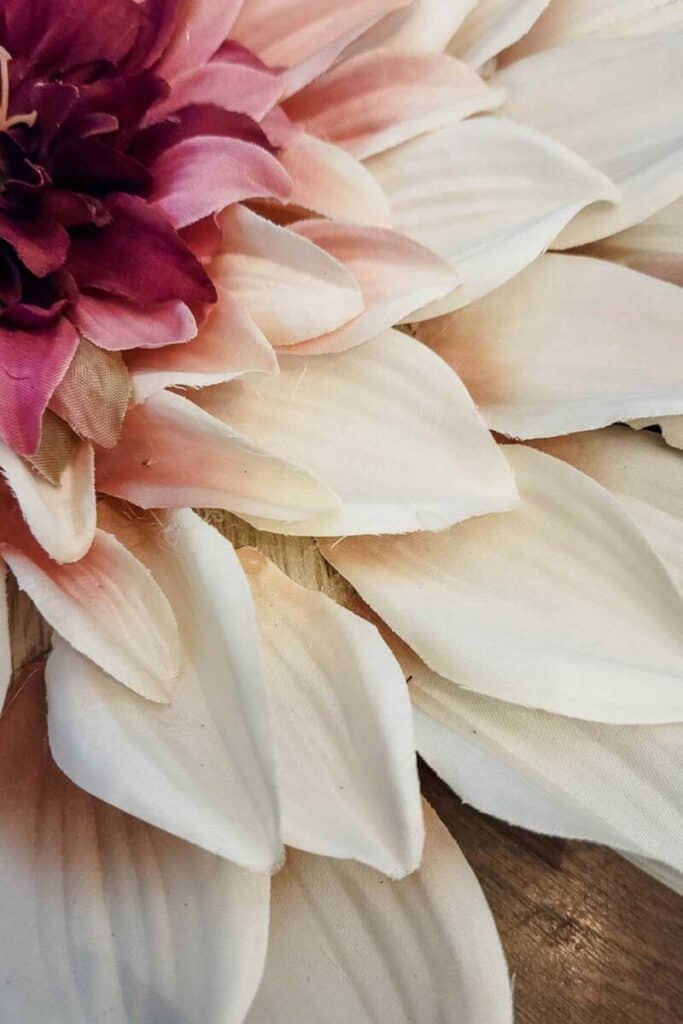
Starting with the largest petals, glue them near the edge of your wooden shape.
Leave a little space as the next row will cover the gap.
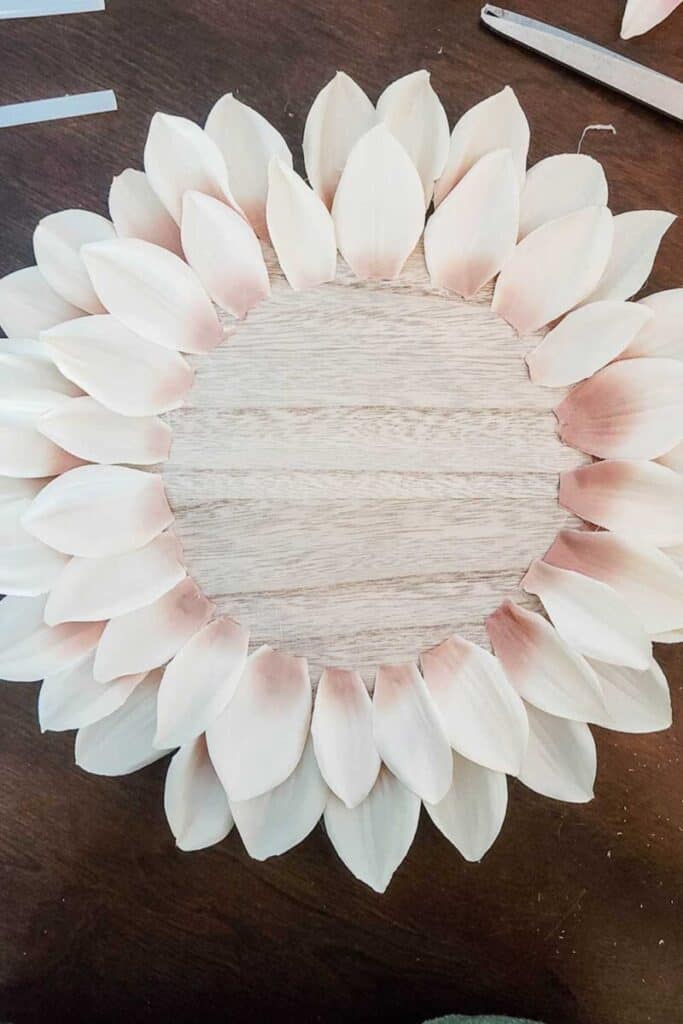
Glue the petals all the way around then start the next row and continue on until you have four or five rows.
Note- be careful to start a new row each time.
Do not continue in a spiral, we want our flower wall hanging to look like a real flower and real flowers don’t spiral.

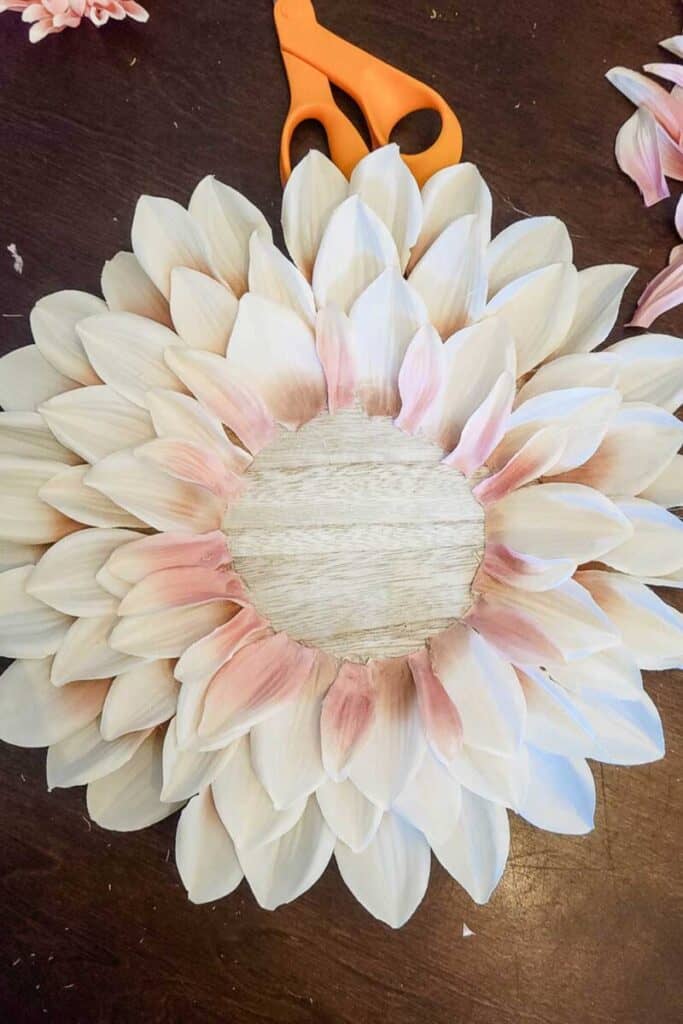
I had originally planned on separating the darker pink flowers like I did the cream ones but as I was taking the first one apart I realized it fit perfectly in the center of my wall hanging.
Remove the backing and stem from one of the darker color flowers and glue it in the center of your plaque by gluing between each layer of petals.
At this point, look around for gaps and fill them in with the extra petals.
You’ll want to make sure the wood is covered completely with petals.
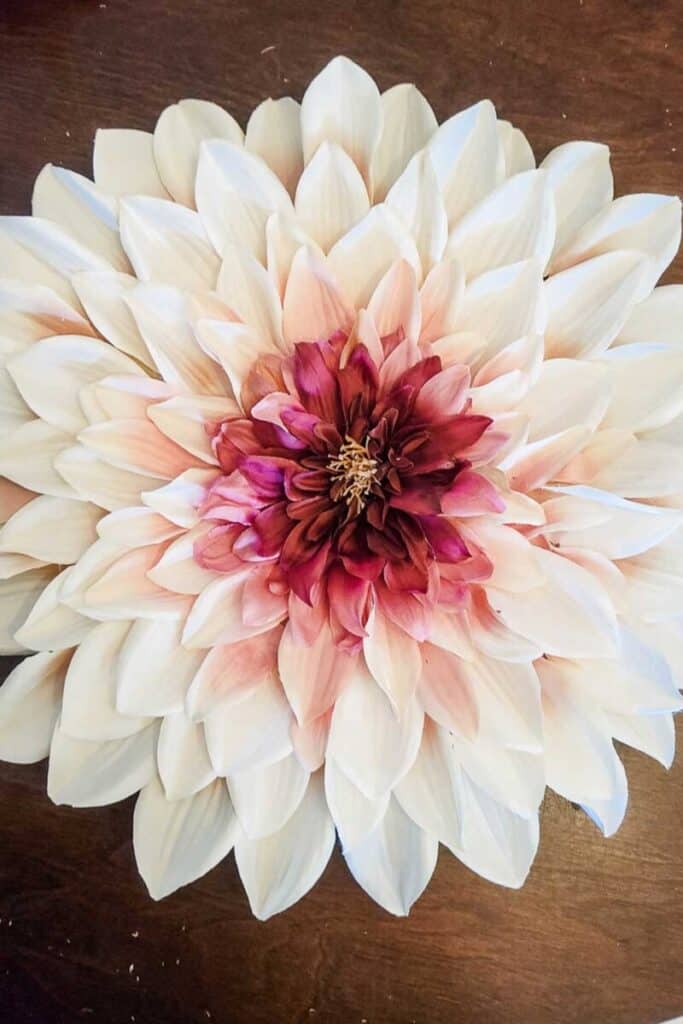
Then step back and admire your pretty flower wall art!
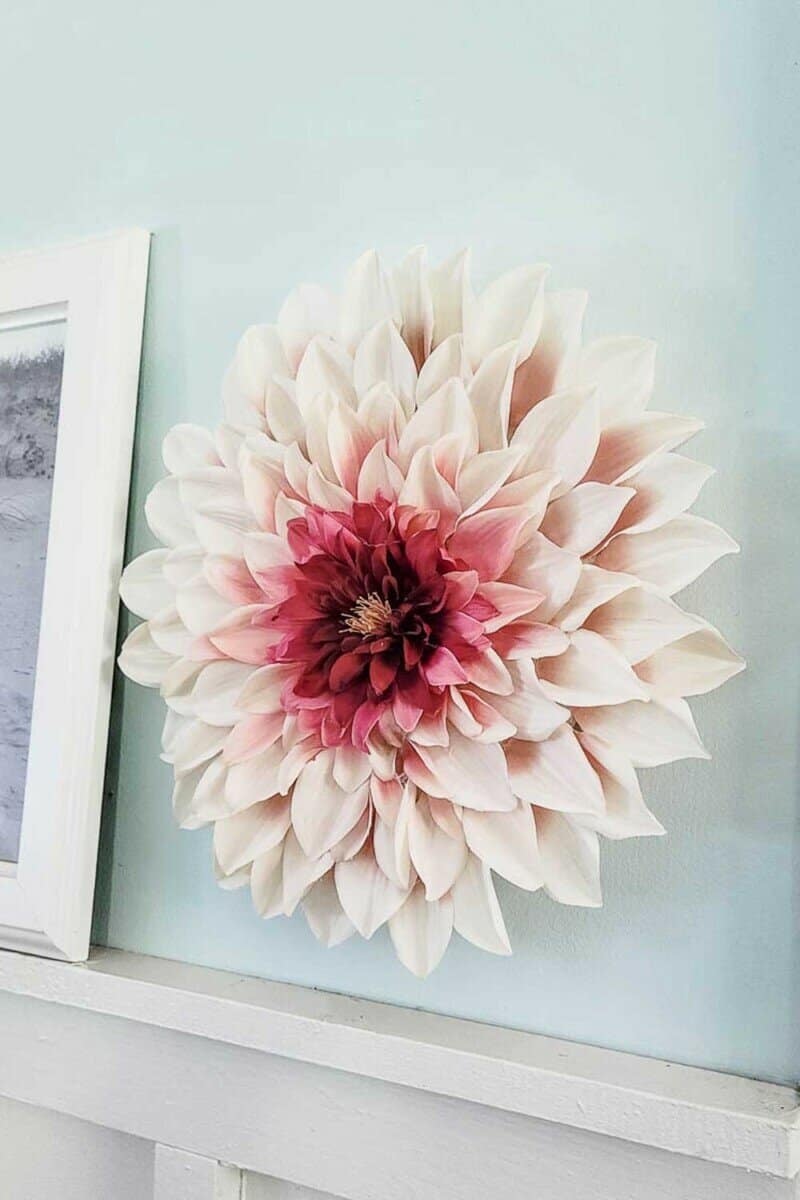
Where to Hang Flower Wall Art
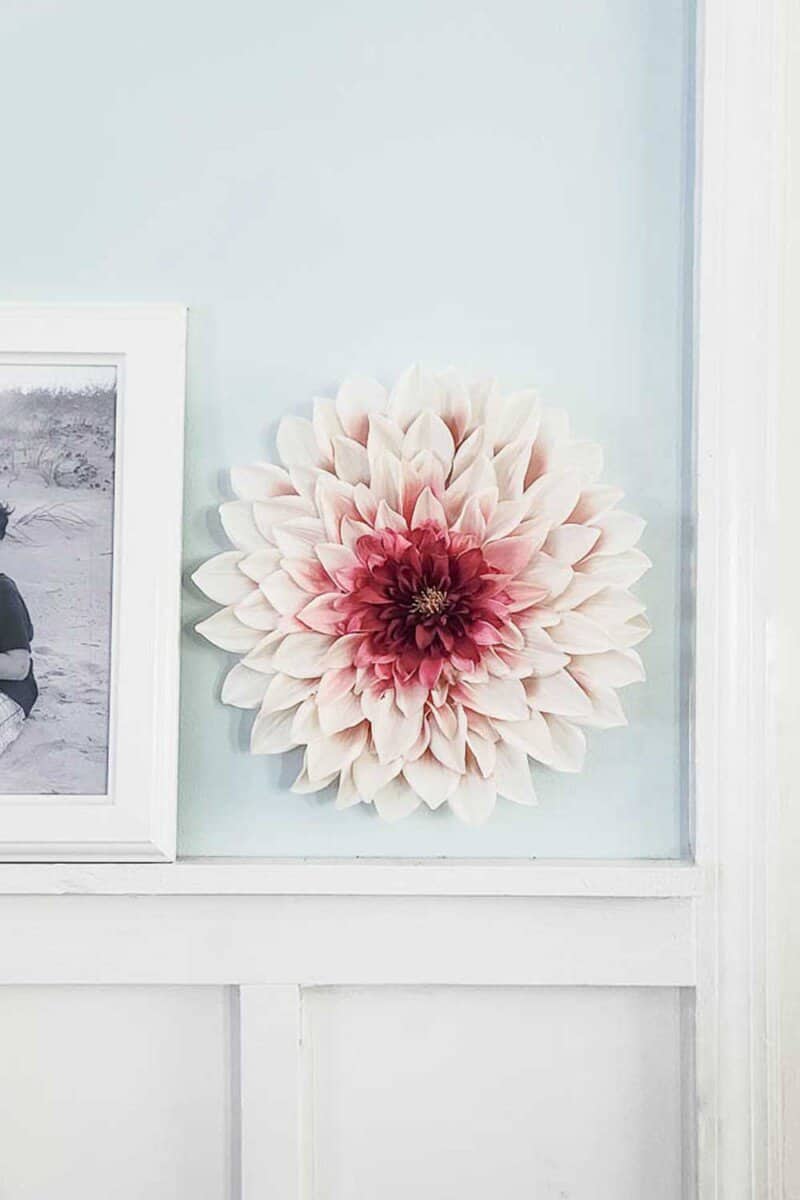
When I decorate our mudroom for fall I plan to move my flower wall art out there but for now, it’s adding color and dimension to the gallery wall in our living room.
You can hang your flower project just about anywhere including
- Entryway
- Part of a gallery wall like mine
- Next to a mirror in a powder room
- Use it as an alternative to a classic wreath
- Hang it between two windows
- Decorate a little (or big) girl’s bedroom door
- Hang your flower art in your craft room so you can admire your creativeness as you craft!
I hope this flower art tutorial inspired you to create something fabulous!
Check out the amazing things my friends created with this same wooden plaque!

DIY 3D Flower Wall Art

This flower wall hanging is such a fun and easy DIY project! Learn how you can create this flower wall art in about 20 minutes!
Materials
Instructions
1. Take apart the flowers that you will use for the outer petals.
2. Once you have the backings off the flowers, remove the outer larger petals from each flower and put them in pile together, then move on to the second set of petals and so on.
3. Using your fabric scissors separate the individual petals and keep like sizes together.
4. Starting with the largest petals, glue them near the edge of your wooden shape. Leave a little space as the next row will cover the gap.
5. Glue the petals all the way around then start the next row and continue on until you have four or five rows. Note- be careful to start a new row each time, don't spiral!
6. Fill in any gaps with extra petals.
7. Remove the backing and stem from one of the darker color flowers and glue it in the center of your plaque by gluing between each layer of petals.
I am loving this cute 3d wall flower and I plan to make several more to use seasonally. Let me know if you create a flower wall hanging, I would love to see it!

This is the cutest thing I have seen in a long time! What an inspiration and perfect for your new gardening adventures!
Of course you would think of making a flower out of a wood circle! This was such a creative project and turned out so beautiful!