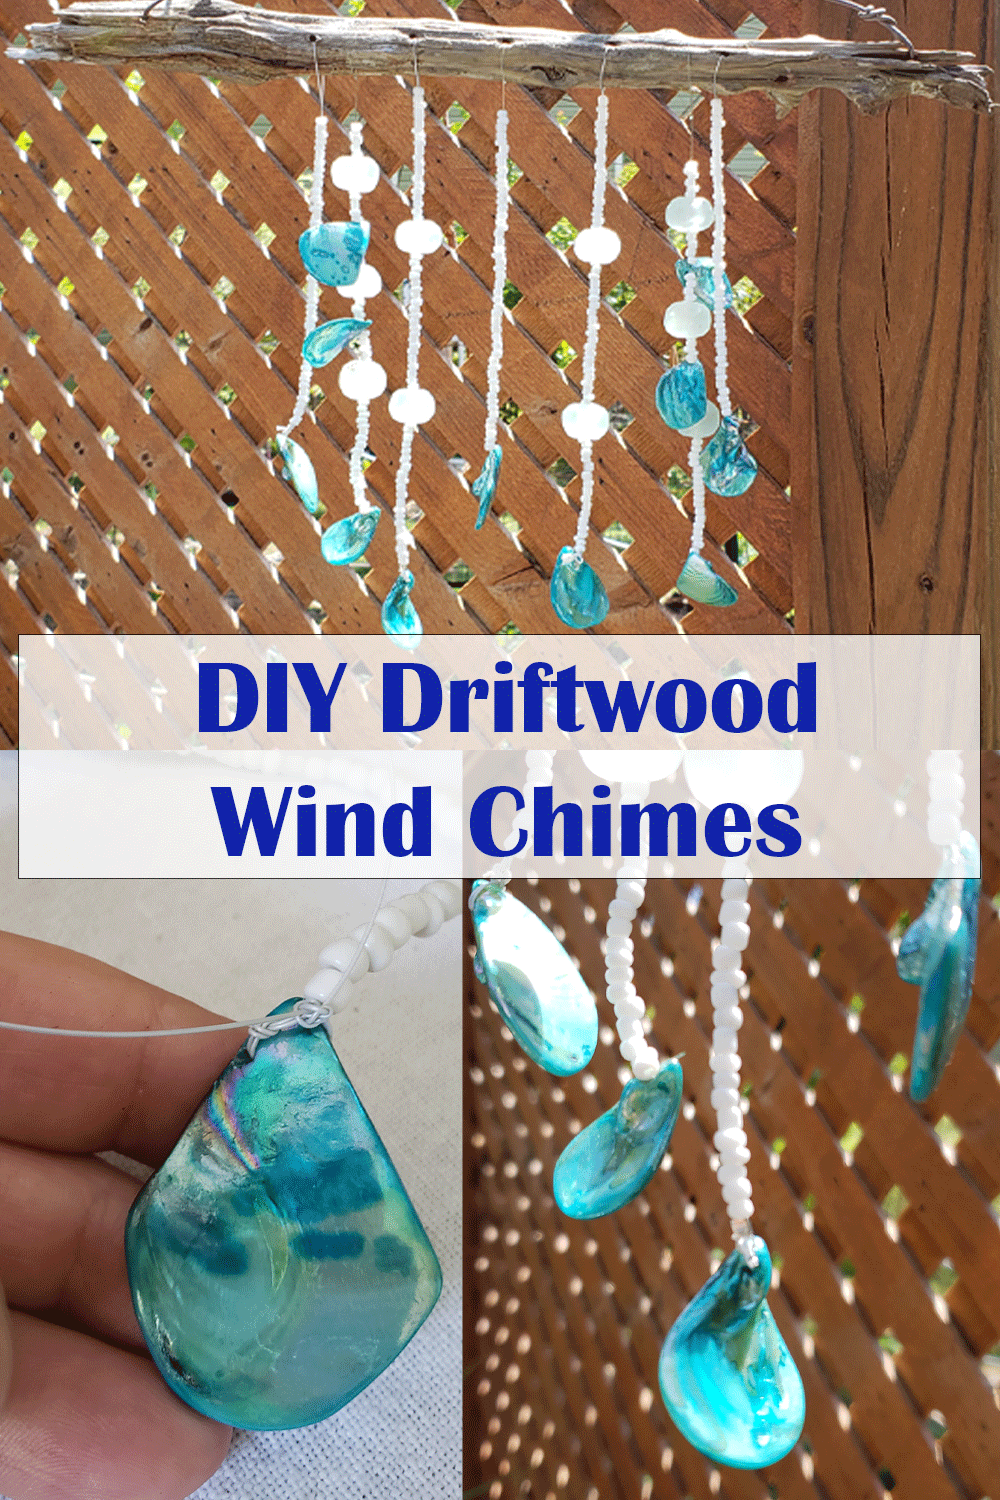
DIY Wind Chimes
Wind chimes add a fun sound to your outdoor spaces. Learn how to make your own with this easy to follow tutorial for DIY wind chimes.
I think every home needs at least one set of wind chimes even if you don’t love the sound (what?!). You can make a set that don’t actually make any sound and just enjoy how pretty they are. It’s easy to make a set that perfectly matches your décor and personality.
This post contains affiliate links. As an Amazon Associate, I receive a small commission at no cost to you!

What You Need to Make DIY Driftwood Wind Chimes
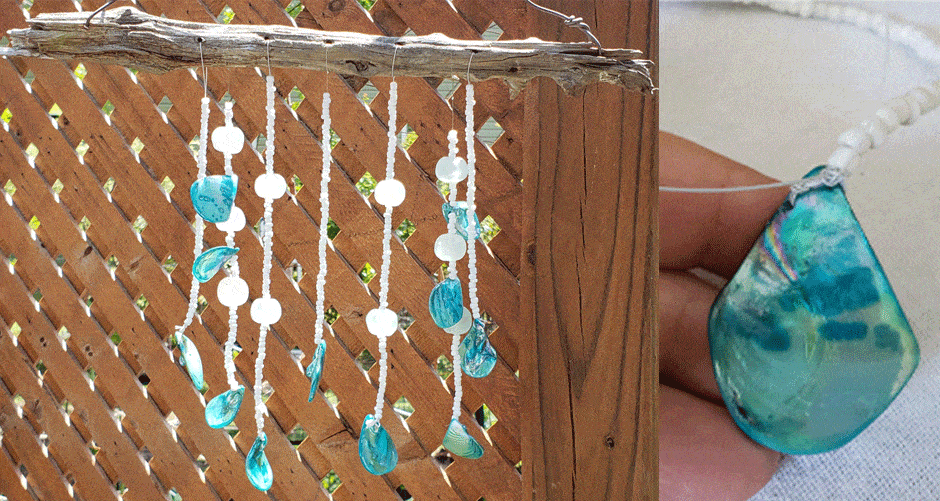
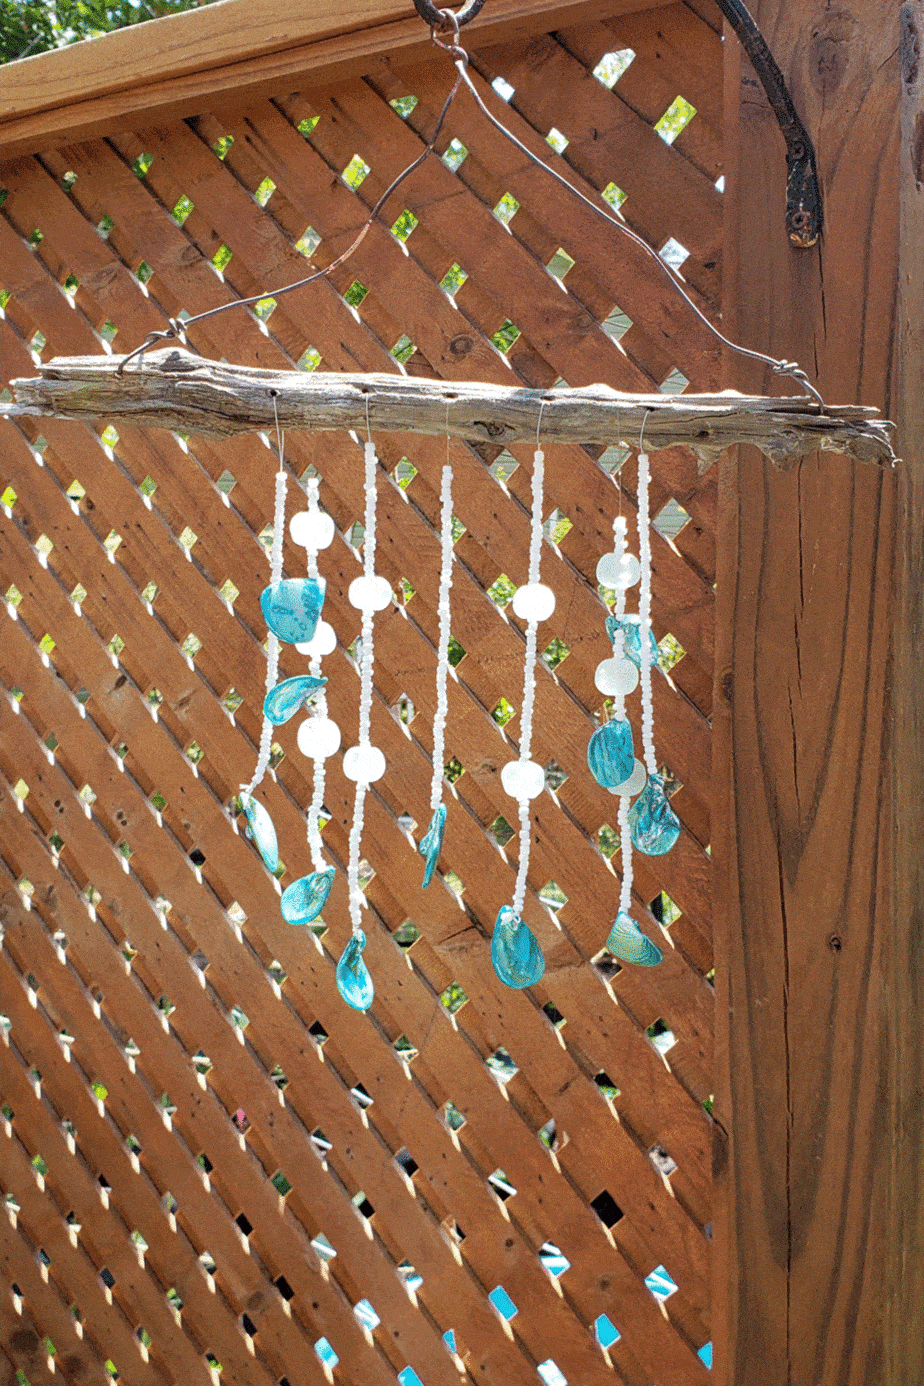
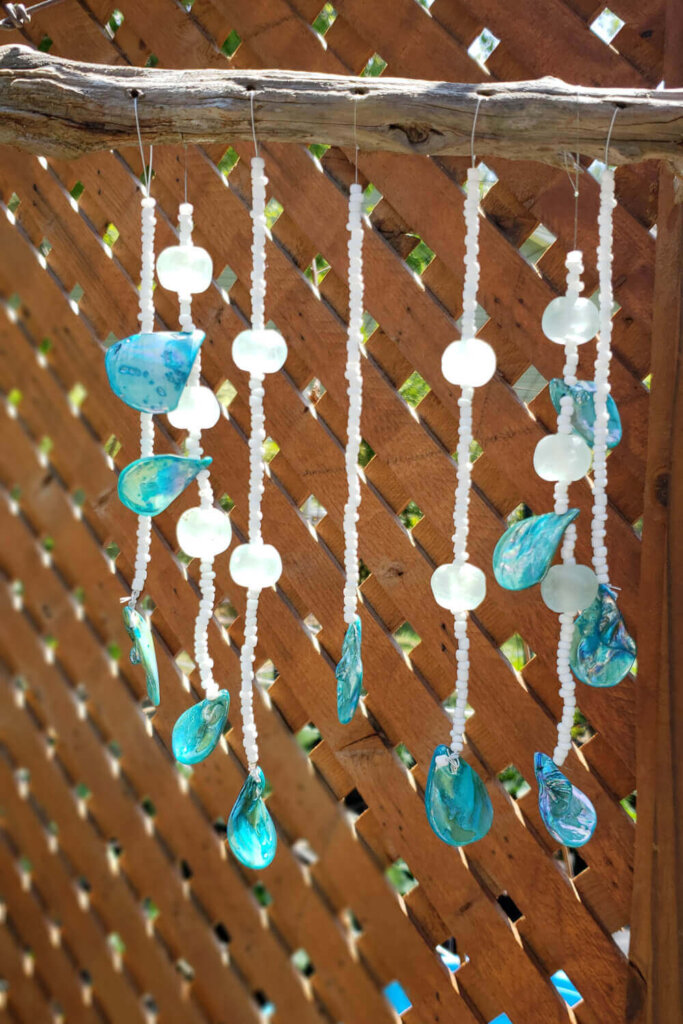
For this project, I refreshed a set of wind chimes that I bought at a craft market in Wilmington years ago. I didn’t want to part with them because I love how beachy they were with the driftwood and turquoise beads. But most of the glass pieces were broken and they were giving our front porch a Sanford and Son vibe!
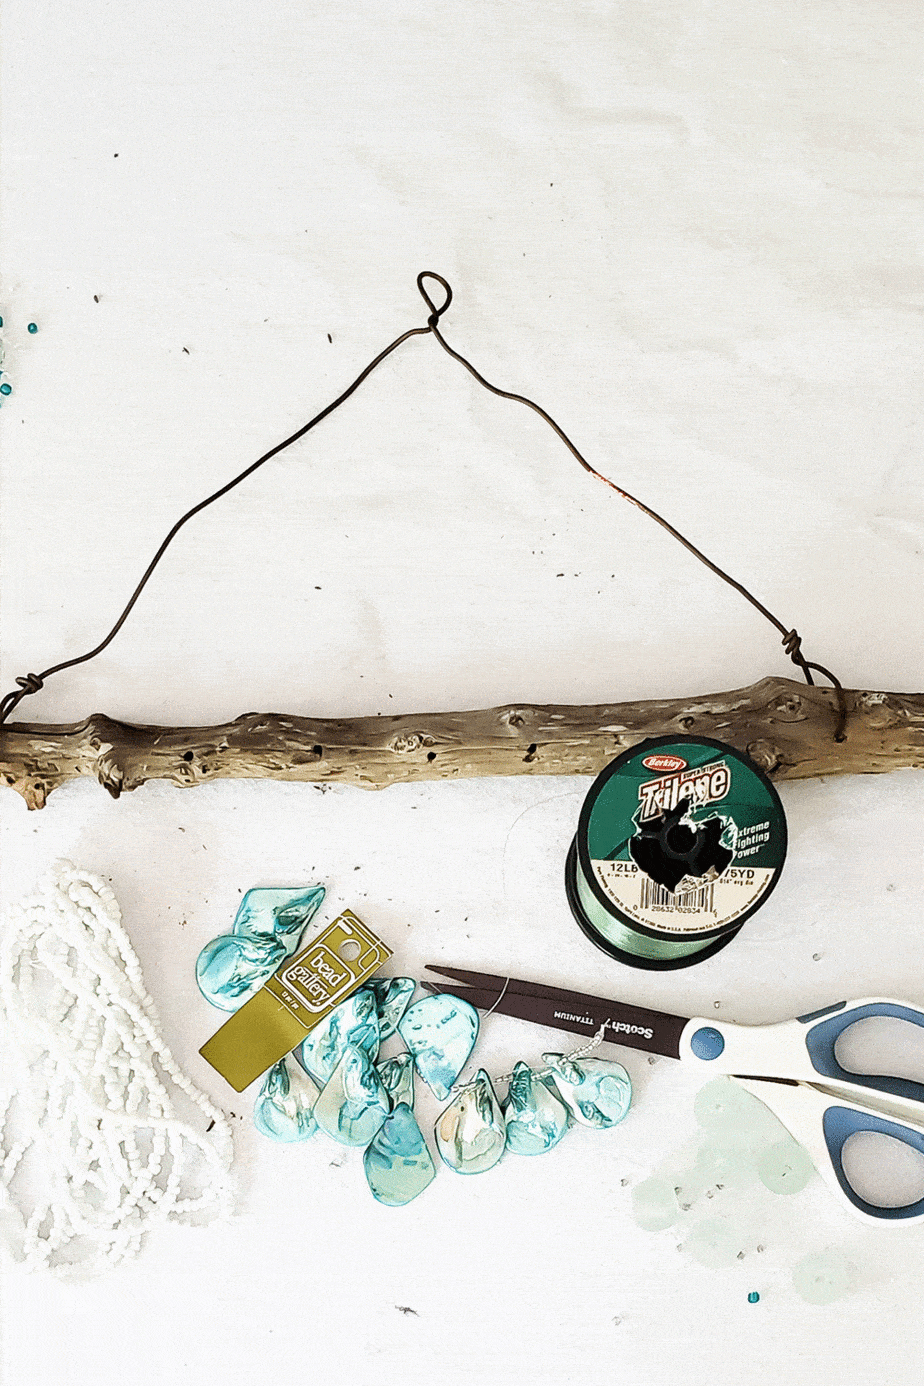
To create your own wind chimes with a beachy feel you will need-
a piece of driftwood – The chimes I was refreshing had this but you can usually find driftwood at most beaches or lakes. If you are unable to find some in nature, you can order nice pieces here
some type of string – you’ll need something to string the beads and shells on. I used both fishing line and beading wire on this project. I think the fishing line was easier to work with.
shells and/or beads – I had planned on using real oyster shells but decided to use colorful oyster shaped beads instead (similar). You could use just about any shell at the bottom but not anything fragile like sand dollars. I also used sea glass beads and white seed beads.
hanger – My wind chimes use a wire clothes hanger but any thick wire or string will work.
scissors or wire cutters – Scissors to cut the fishing line or wire cutters to cut beading wire.
How to Make DIY Wind Chimes
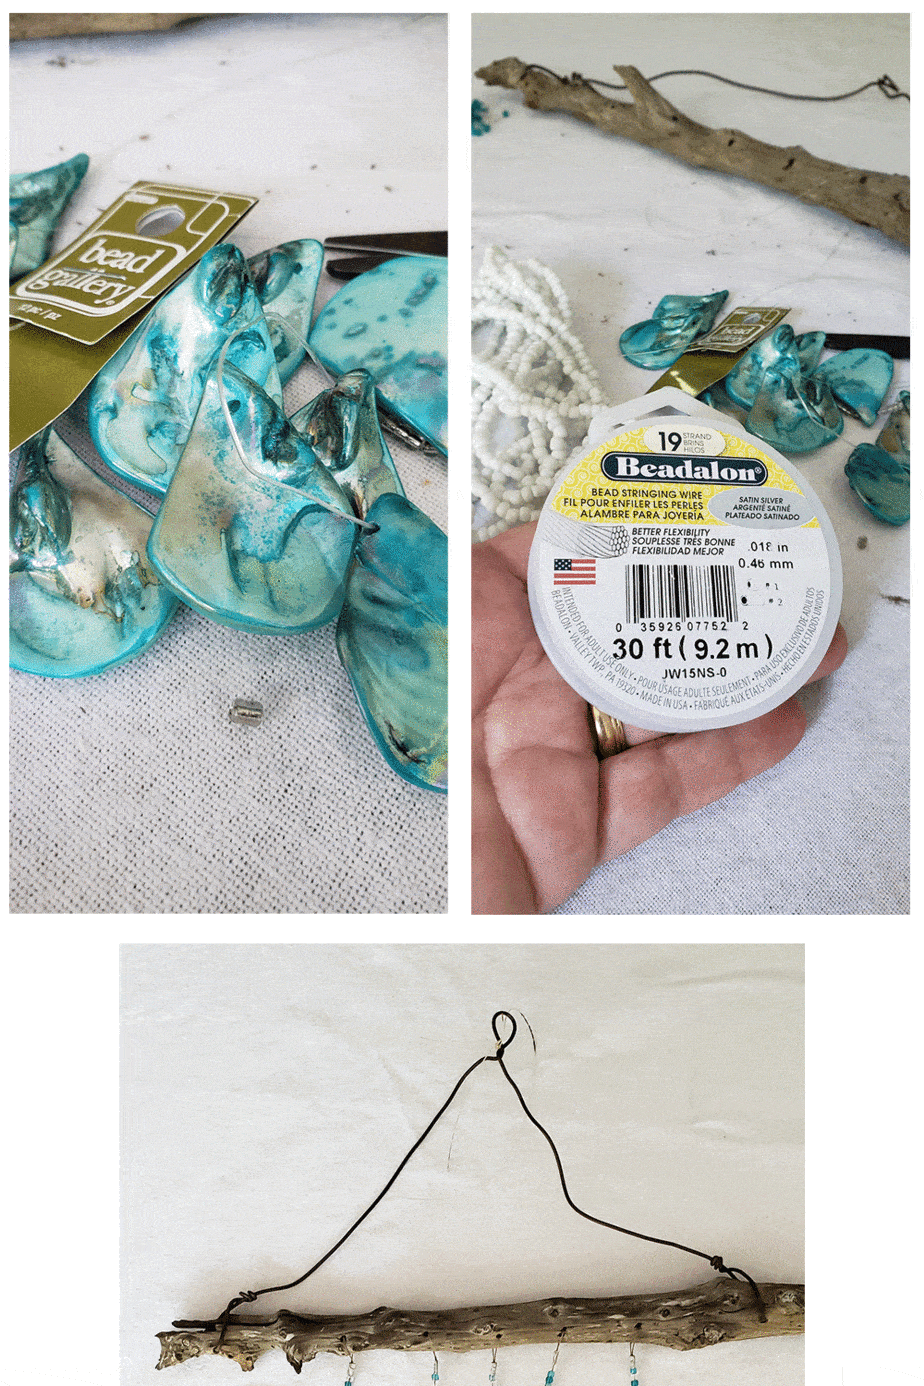
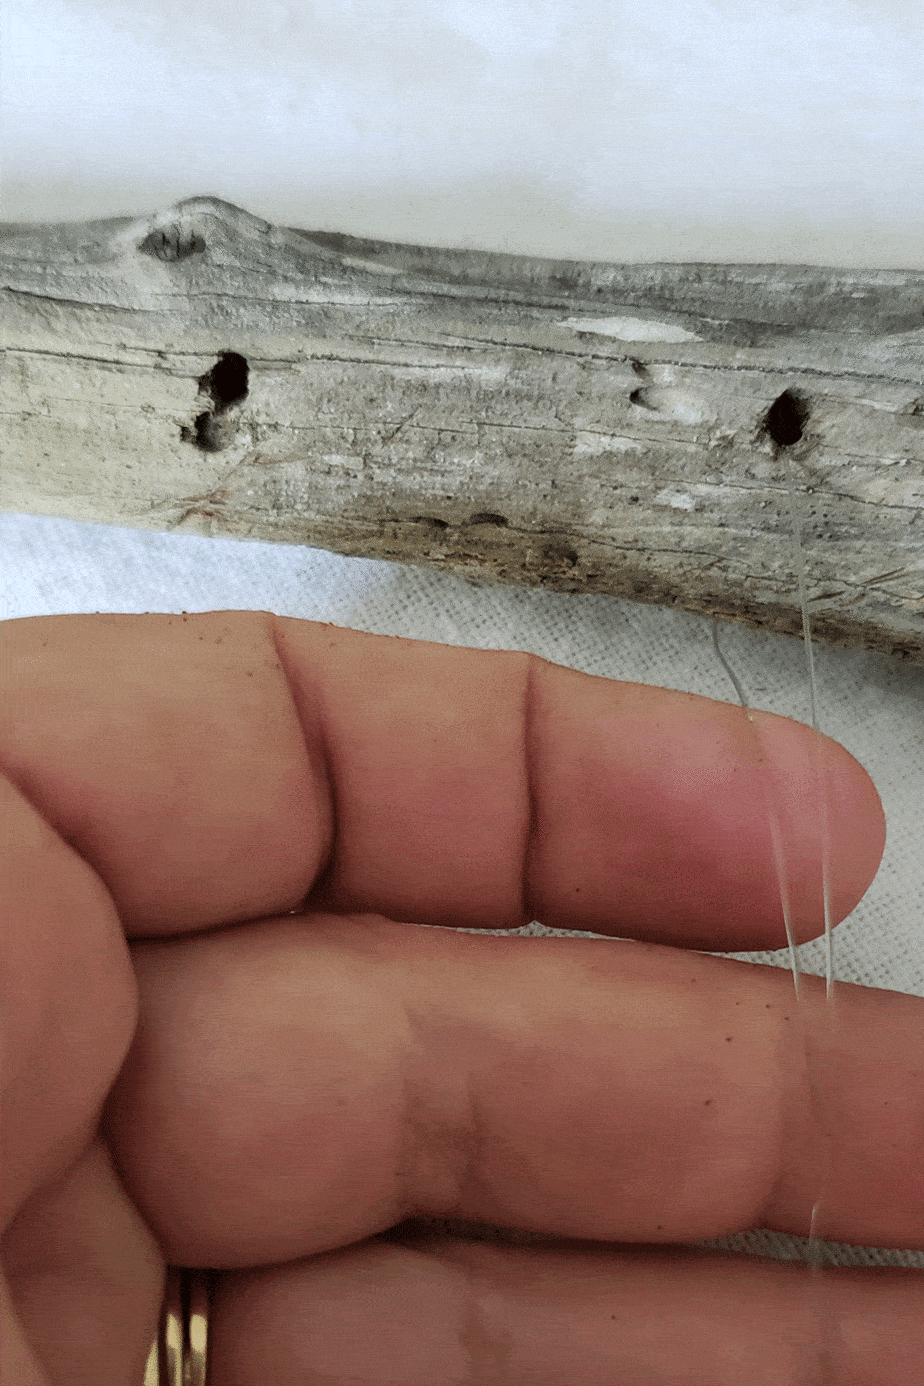
- Drill holes horizontally though your driftwood to string the fishing line/beading wire. Toward each end of the driftwood drill a hole for the hanger.
- Thread one end of the hanger through the end holes and twist on to itself. Repeat with other end.
- Thread fishing line/wire through each hole then thread the beads in whatever pattern you like. I mixed mine up a bit and did three different patterns.
- After stringing the last bead or shell, tie off the end of the string and snip with scissors.
- Hang your new wind chime and enjoy!


I am joining a couple friends for our monthly New Again posts! Every month we each take something old and give it a refresh to make it new again.
New Again

Noting Grace
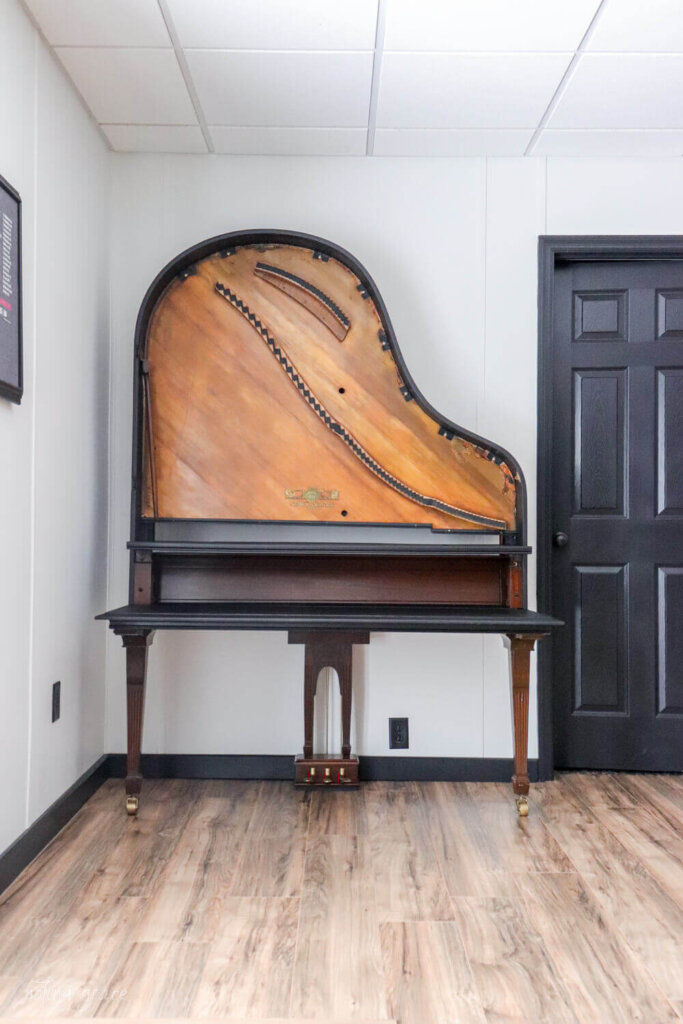
How We Made an Old Piano New Again
Roots of Home
How to Make a Dough Bowl Centerpiece

Sand Dollar Lane
DIY Wind Chimes
More DIY Projects
DIY Wooden Bathroom Shelves
Ladder Golf DIY – How to make your own lawn game
DIY Leash Holder
How to build a DIY Boot Tray
Join me on Pinterest Facebook and Instagram for more outdoor decorating ideas!
Wind chimes are a fun DIY project and a great gift idea. If you make a wind chime using this tutorial, let me know! I would love to see your project!