
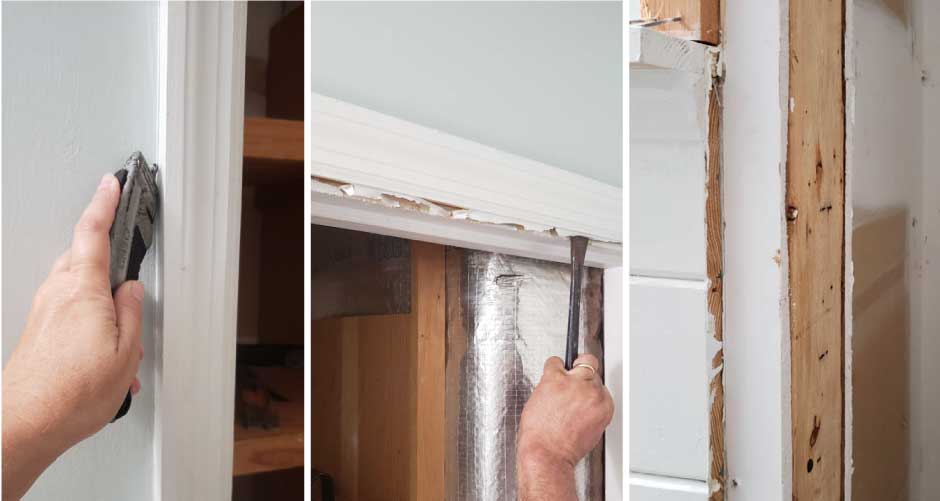
How to Remove a Closet Door Frame
The first step in changing a bathroom closet into storage shelves is removing the doorframe. With a few simple tools, it’s quick and easy to remove the door, trim and frame.
It’s week 2 of the $100 Room Challenge hosted by Erin at Lemons, Lavender and Laundry
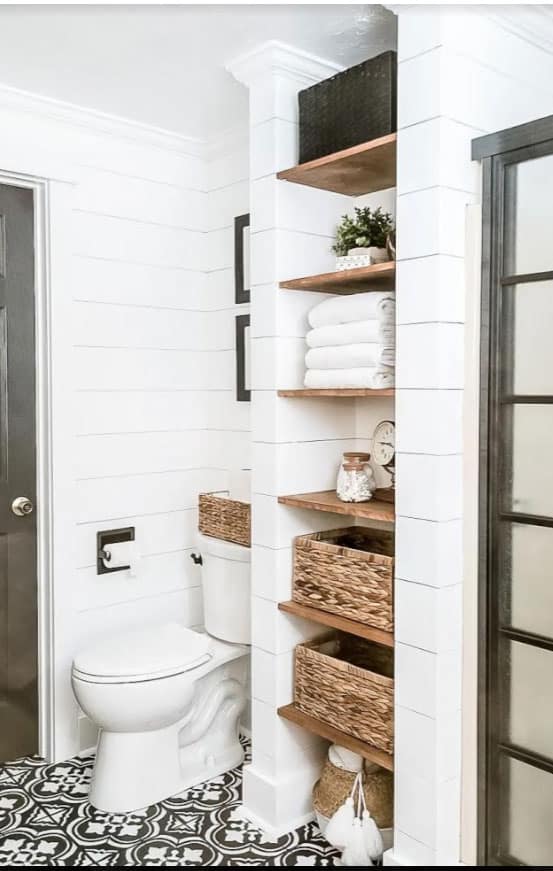
Last week I shared my plans and inspiration for changing the world’s ugliest bathroom closet into a beautiful organized and functional closet. You can see my plans here.
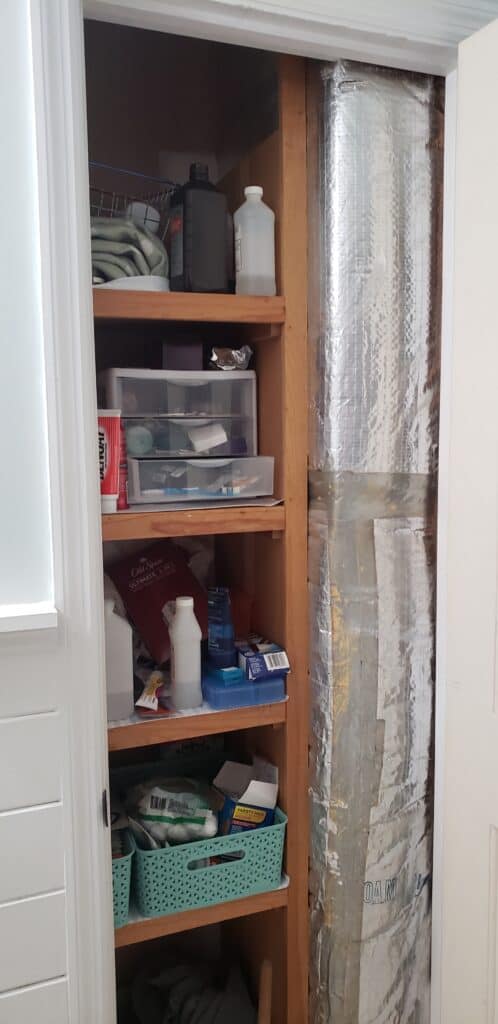
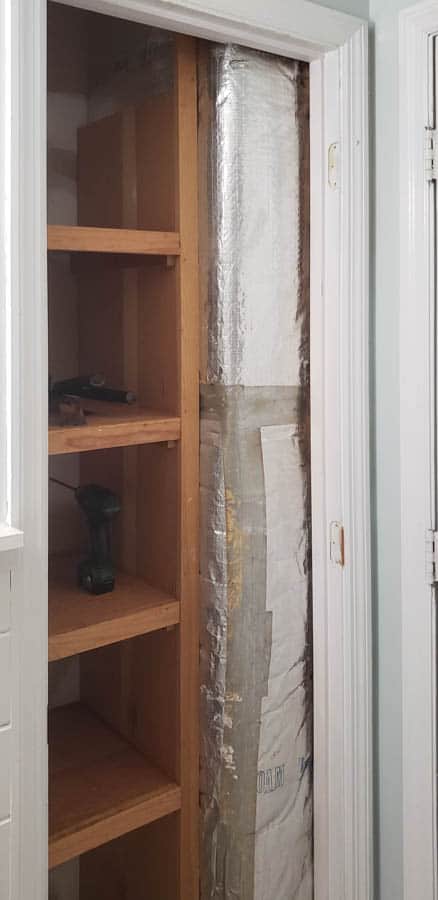
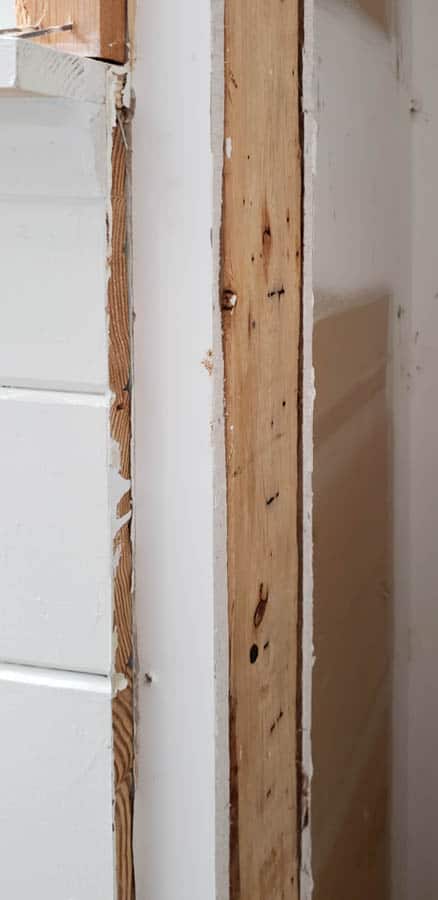
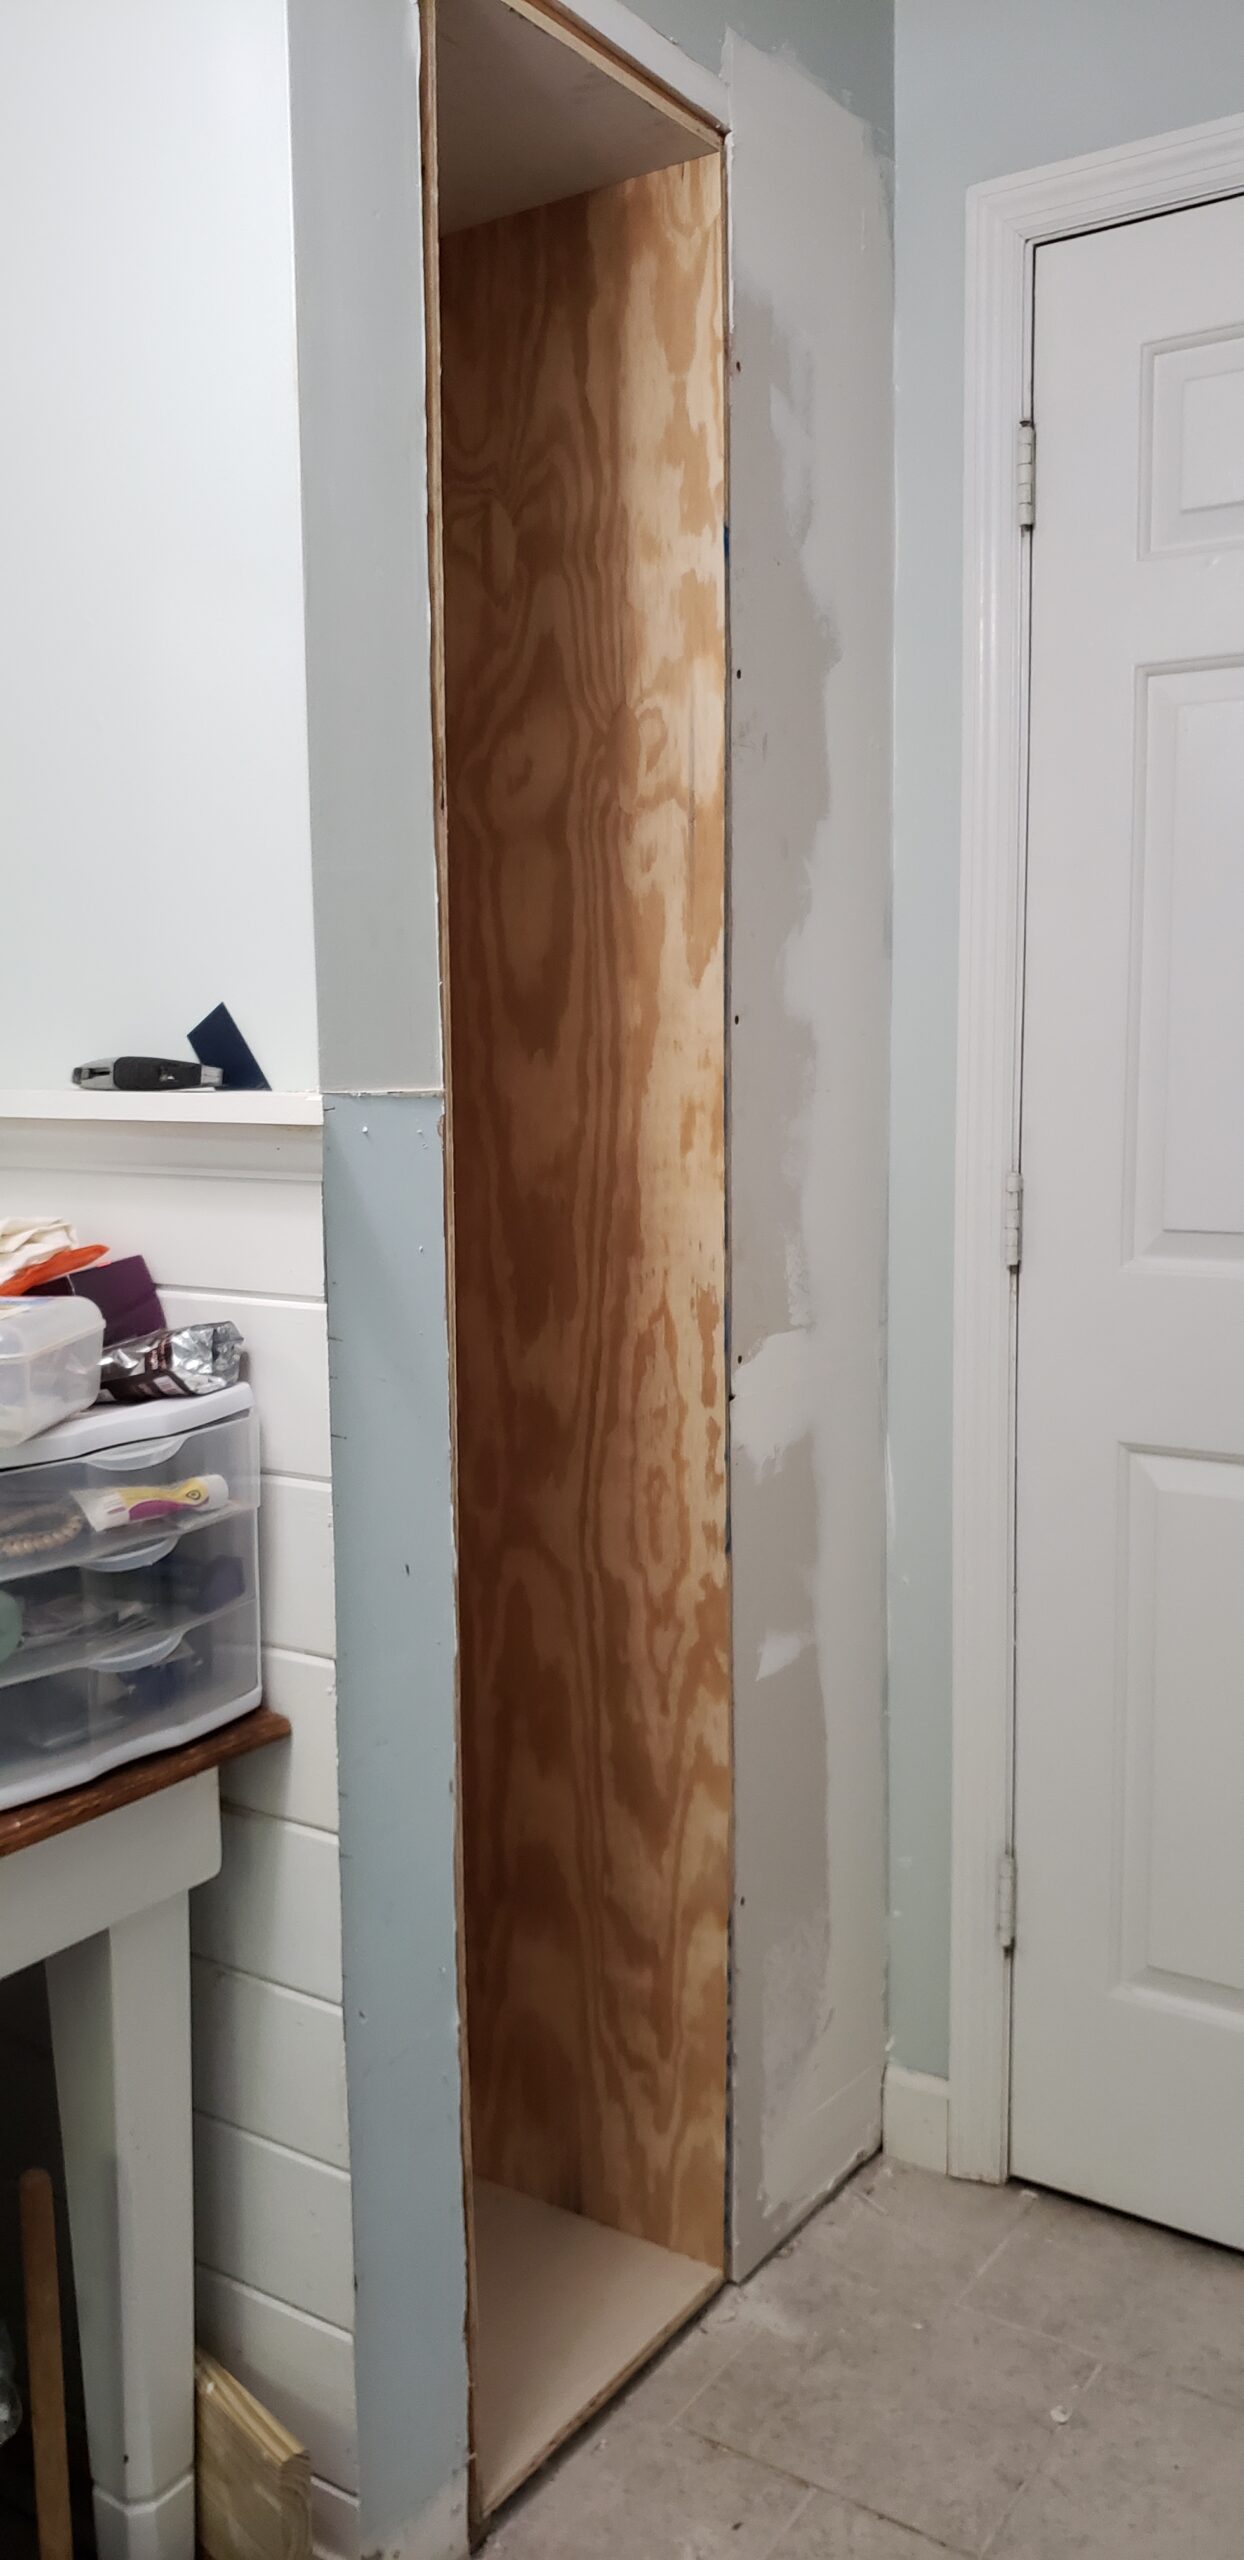
This week, we removed the closet door, all the trim and the door frame. Then we discussed, planned, figured, discussed some more, measured, planned more, got in a little spat and now we still aren’t 100% sure the exact logistics of the rest of the project. But the door frame has been removed!
Tools Needed to Remove Door Frame
- heavy duty box cutter (I just ordered this one)
- hammer
- pry bar
- screwdriver or cordless driver
(I have this set and love it!)
How to Remove a Closet Door, Trim and Door Frame
- Remove the door by unscrewing the hinges from the door frame. Tip, unscrew the top hinge last for stability so the door doesn’t hit you in the head.
- Remove striker plate from the frame with screwdriver/cordless driver.
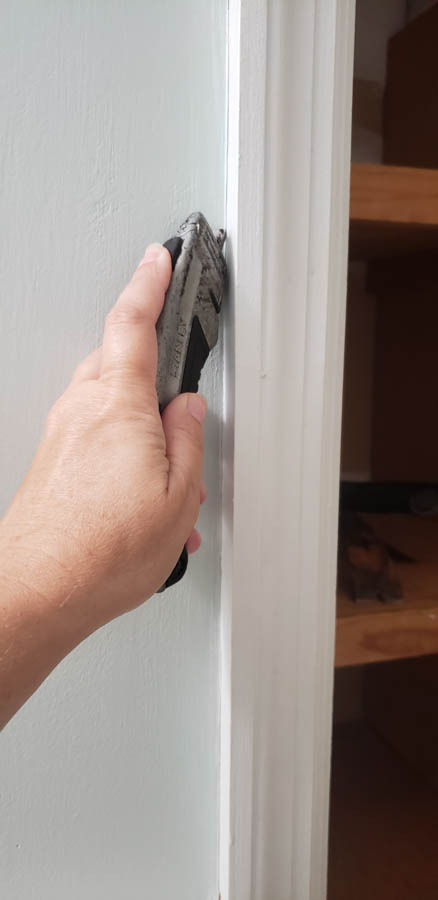

- Using a heavy-duty box cutter, cut along the edges of your trim to score the caulk
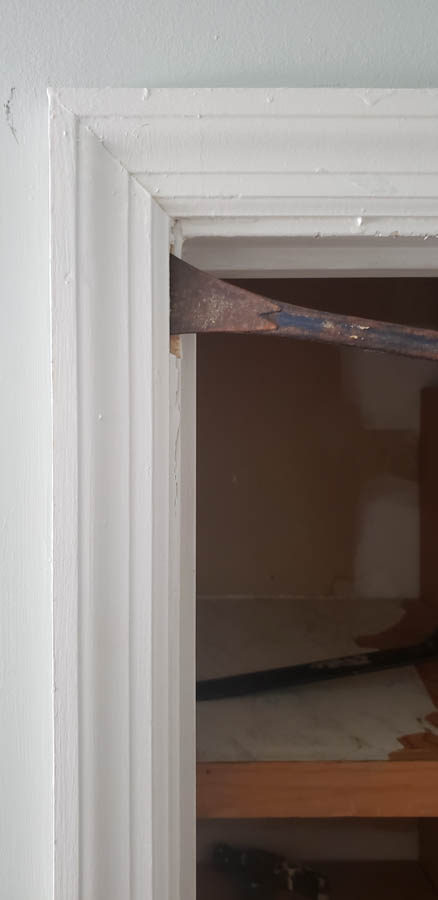
- Remove all trim with pry bar
- Use pry bar and hammer to pry out all pieces of the door frame.
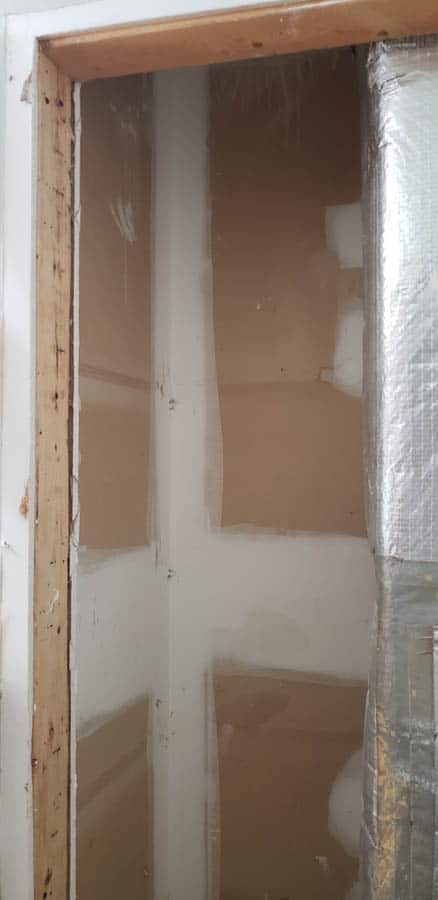
We removed the existing shelving and now that the door, trim, and frame have been removed, it’s a little easier to envision how our bathroom closet project is going to turn out!
The plan for week 3 is to start building the wall to hide the heater vent and build the shelving.
In the meantime, be sure to check in on all the participant’s progress. There are so many great projects!


I can’t wait to see how this turns out! I love your idea of an open built in for your space!
I’m so excited to see this closet space opened up to the bathroom (without the duct work being visible). Hope you figure out a good plan that works for the space!
Great tutorial in removing the door frame. Can’t wait to see more. ITs going to look more open now.
When my man and I do a project we always get in a spat- I think it’s a requirement. Looking good so far- sometimes just getting into it helps 😉 Good luck
It’s looking great!!