
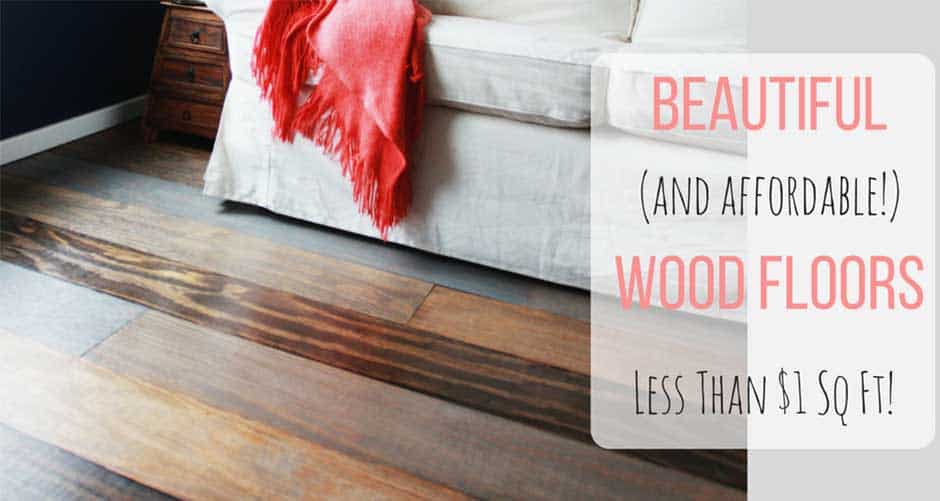
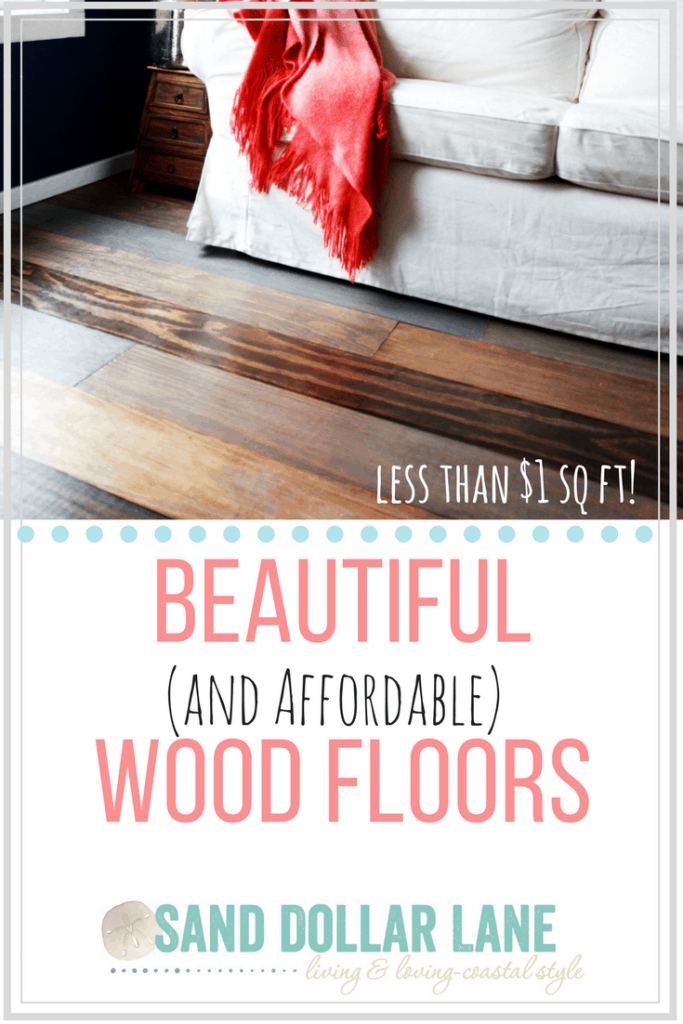
Beautiful Affordable Wood Flooring
Here’s an easy diy flooring idea! These affordable wood floors were easy to install and they are beautiful!
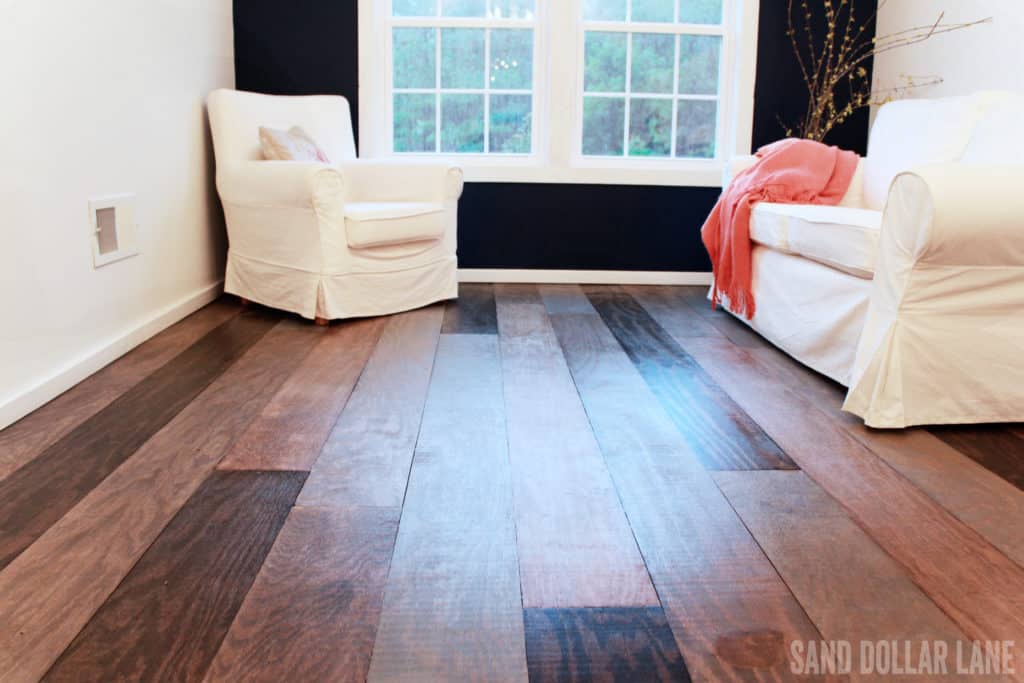
Building my art studio/craft room was put on hold for a while (kids, running a business, other house projects and life in general made it necessary to put the studio on the back burner). Now, after three long years of having an empty shell of a space above the garage we are finally working on building my art studio! After the drywall was up (my gosh what a process that is!) we started on the flooring. Since we were working with a tight budget (see above mentioned kids, self employment, other house projects) we had to find an inexpensive solution. But it couldn’t just be cheap, I have been waiting a long time for this space so I knew we needed something beautiful as well.
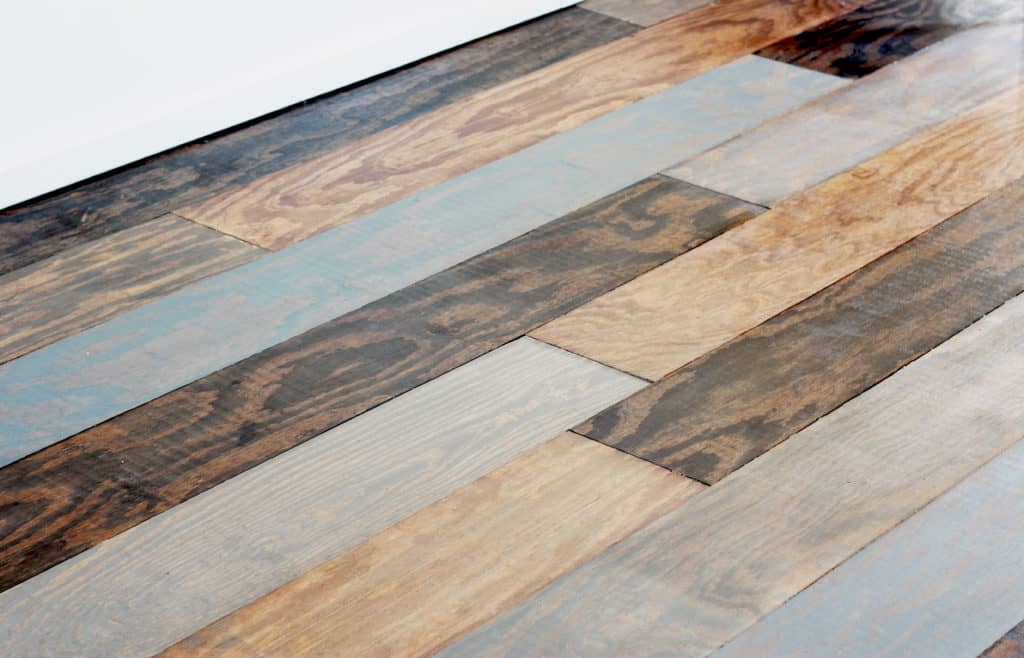
After much searching, planning, pricing and searching some more we decided to DIY (because that’s how we roll) plywood flooring.
Yeah, you read that right, plywood!
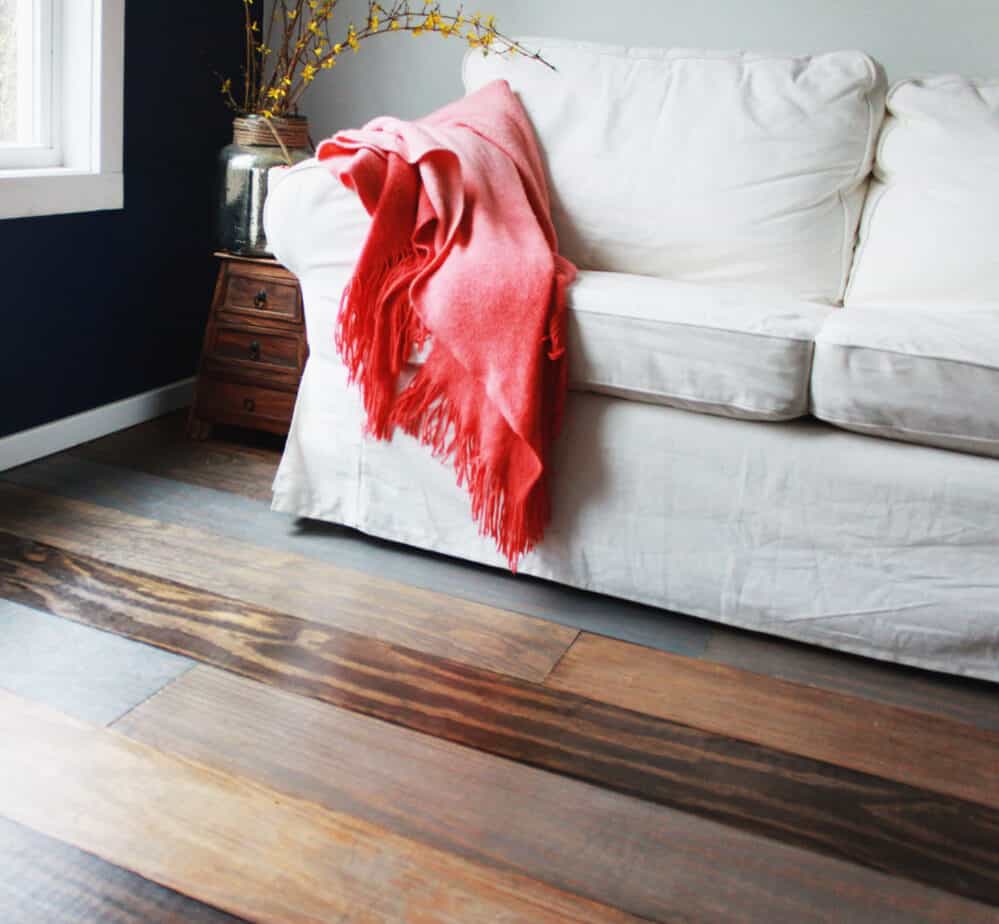
We are so happy with it and our budget is feeling pretty good about it as well. This gorgeous floor only cost about $1 sq ft!
Material List
For your convenience, this post contains affiliate links. See my full disclosure page here
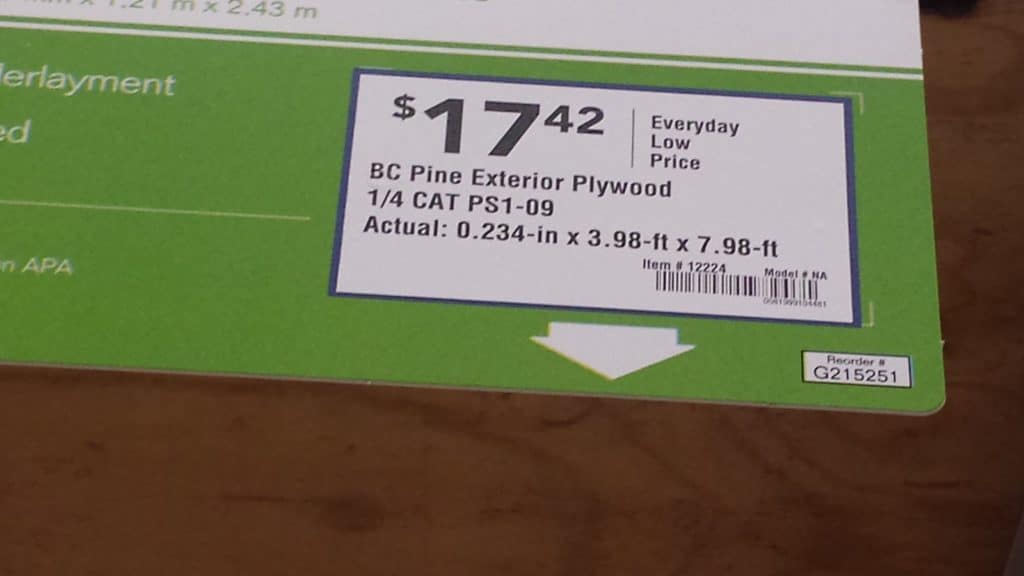
- Sheets of Plywood– each sheet is about 32 sq ft so we used 7+ for our 230 sq ft room (we found ours at Lowes)
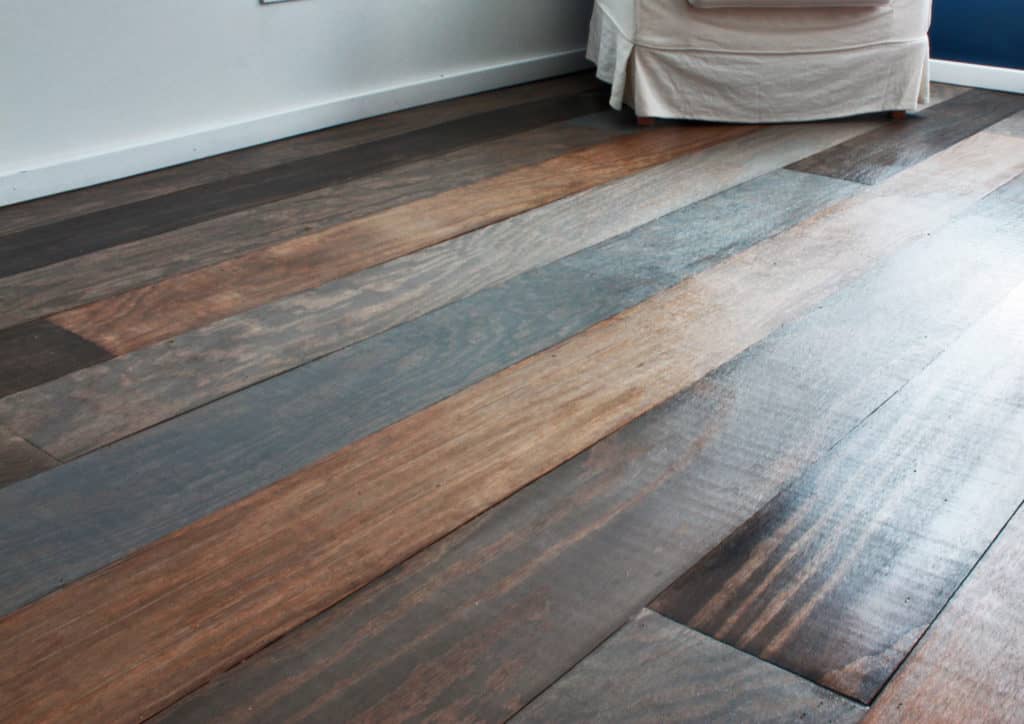
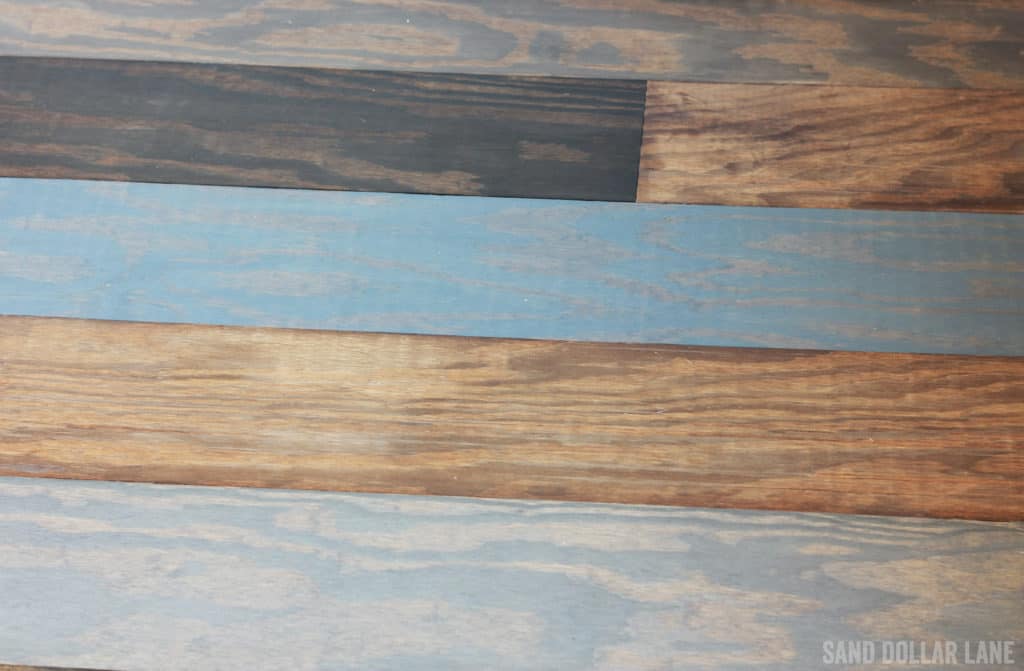
- Minwax Wood Finish in Provincial, Classic Gray and Espresso
- Minwax Ultimate Floor Finish
- Floor Finish Applicator
- Sanding Block
- Wood Floor Glue
- Table Saw, Air Nail Gun, Staples
These are the steps we took to create our Beautiful Affordable Wood Flooring
- Ripped plywood into 8″strips on table saw. This is a million times easier with help.
- Sanded down any rough edges from the ripping.
- Stained pieces individually five different colors – 3 original Minwax Colors (see above) and 2 mixed (dried for 24 hours)
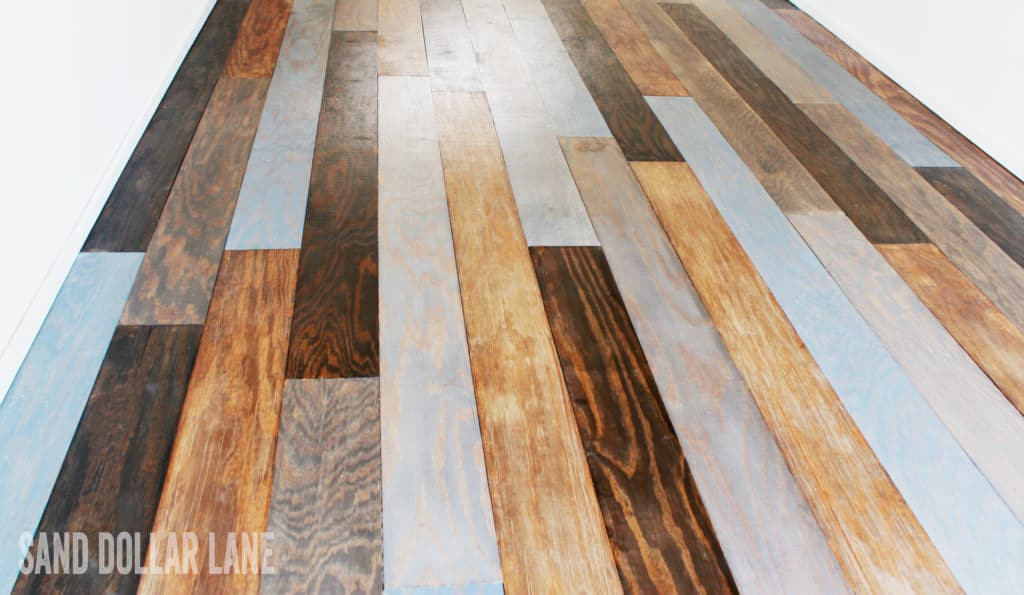
- Laid out on sub floor to get an idea of pattern we wanted to use. We were careful to not put two boards of the same color next to each other. Having five colors made this pretty easy.
- Cut starters and laid down first row.
- Applied glue to back side of stained flooring and tacked first row into place.
- Staggered the start of second row and pushed snug against first row. Since we ripped the boards ourselves we knew they weren’t completely straight so we didn’t worry about leaving space between them. If you have perfectly straight boards you will want to leave a small space (a nickel wide ish) between the boards.
- Continued to glue and tack rows of flooring staggering colors and joints.
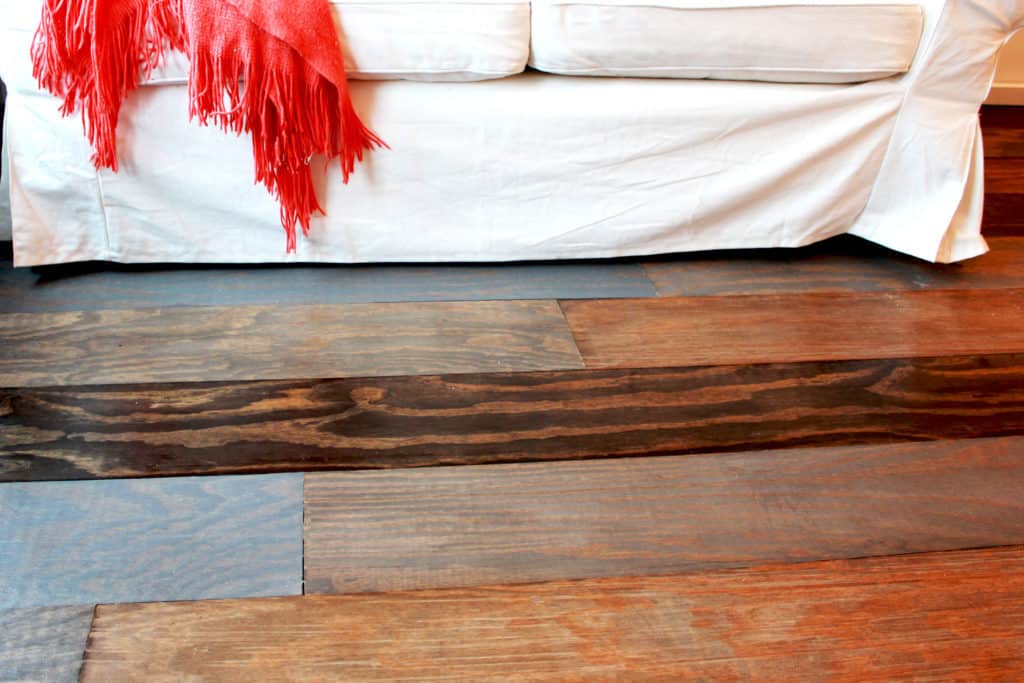
- After installing all the planks I went back and nailed it all down with the air nail gun so it sat nice and flat making sure all joints looked good.
- Applied Floor Finish with applicator. Let dry, Reapply You all, this step was amazingly simple! I had put off this project for so long because I was going back and forth on if I wanted to sacrifice the time and energy I thought it was going to take to poly the floor. Turns out it took maybe 15 minutes for each application (we did three). We simply put the floor finish in a paint roller pan, screwed the applicator to a mop handle and mopped it on. Seriously, that is it! No sanding at all! And you only need to wait two hours before adding the next coat.
- Wait 7 days before moving furniture into the room (the waiting was the hardest part!)
Picking and mixing stain colors was fun and easy. We used a piece of scrap wood to ensure that we loved each color. When we nailed the flooring planks down we used small nails so we did not have to fill in any holes before applying polyurethane. Some home stores will rip your plywood for you, our local Lowes does not. When staining be sure to stain the sides of your planks as well so your joints look great.
James and I love working together on projects and this wood flooring project was a relatively easy DIY, inexpensive with beautiful results.

JC says, “The Minwax stain. It applied easily & the colors look great together.”
Leen says, “The installation of the flooring. I enjoyed planning the layout and using the air gun to install the boards.”
What do you think? Would you use plywood for your next flooring project? If you have any questions, we are happy to help. Just leave a comment and we’ll answer as soon as we can.

Absolutely gorgeous!!! Just popped over from remodelaholic. I’ve been wanting to do floors like this for YEARS! We have a mobile home that we’re fixing up as frugally as possible, due to the fact that we want to rebuild/remodel the original house on our property. The carpet in this mobile is 22 years old and it’s seen it’s last days. No matter what we do it doesn’t come clean and the smell….ugh! We need to do something! I think that the pricing is perfect. Considering the mobile is under 1000 sf, that would be less than 1K to refloor the whole mobile!
Looks great! I’ve read a lot of installs on the web and you are the only one that went as thin as 1/4″. Did you have any issues using plywood that thin?
Hey Jim, no problems at all. I think that’s because we installed it right on top of the sub floor. I glued it and nailed it down.
Your floor is absolutely stunning!!! I love the combination of colors, they all compliment each other wonderfully and I just love the pop of turquoise. Can you please tell me if you used a water based or oil based floor finish and was it satin, gloss or semi gloss? Thank you for your help!
Hi Catina! I sealed the wood with Minwax Ultimate Floor Finish. It was super easy to use!
What colors did you mix for your two mixed stains?
Hi Sal, The two mixed colors were both the gray and espresso. One was 3/4 gray and 1/4 (ish) espresso and the other was 3/4 espresso and 1/4 gray. We tested several different mixes until we found the ones we loved.
I love it and this is exactly how I am thinking of doing my floors! I may do a lighter color on the stains, something with more white to it. Which color did you get that grey-blue color from? Thanks for putting into pictures what my imagination was shooting for!
I am so glad to hear it! The grey-blue is the grey stain with no added colors. It’s definitely more grey than blue in person 🙂
Beautiful! This is exactly what I am wanting to do on an accent wall. Can you tell me what lengths you cut the boards? Also, what stains did you mix to get the other 2 colors? Thanks!!
The two mixed colors were both the gray and espresso. One was 3/4 gray and 1/4 (ish) espresso and the other was 3/4 espresso and 1/4 gray.
I started with the first board being the full 8′ then cut the others in that line to fit the length of the room. I like the boards all staggered so they are many different lengths 🙂
Amazing! Love the all the beautiful colors- so unique! I’m a newbie with flooring. Questions: how do you decide where to put the first row? What is ‘tack’?
We started in the far corner with a full 8′ piece. Then staggered each row so the seams didn’t line up. So the first row started with an 8′ long piece, the second row started with a 4′ long piece, etc. By “tack” I mean just one or two small nails to hold the boards in place while I layed them all out. Once they were all in place I went back with the nail gun and added more nails. Let me know if you have any other questions 🙂
Oh my gosh, these look gorgeous !!!
Thanks Debb 🙂